Civic HX - CVT to Manual Transmission Swap

Wednesday, January 16, 2008

Intro


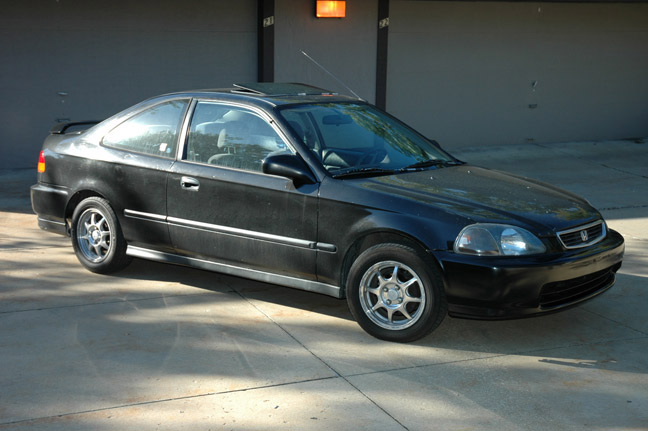
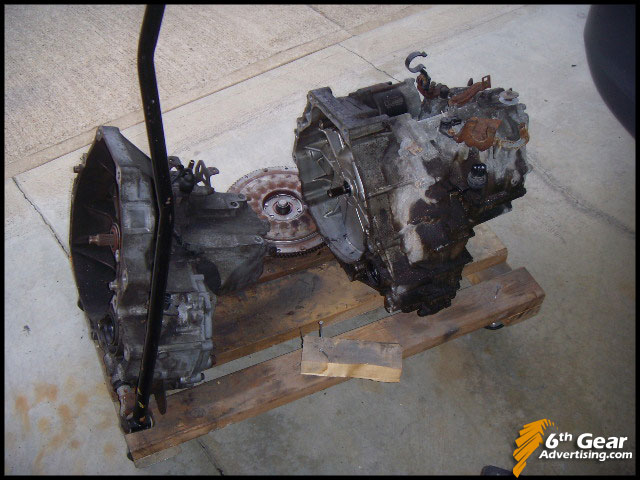
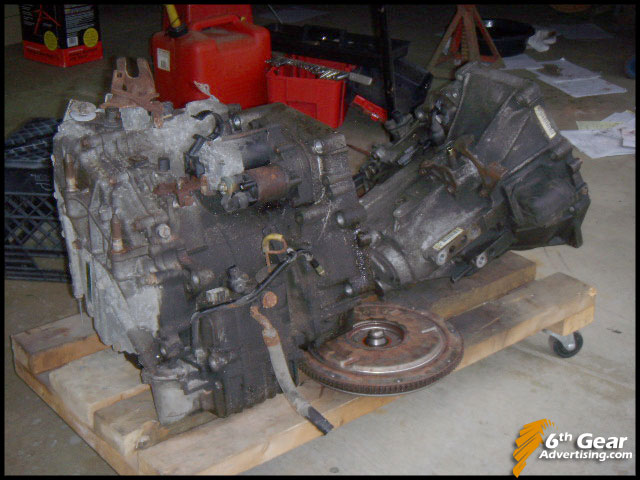
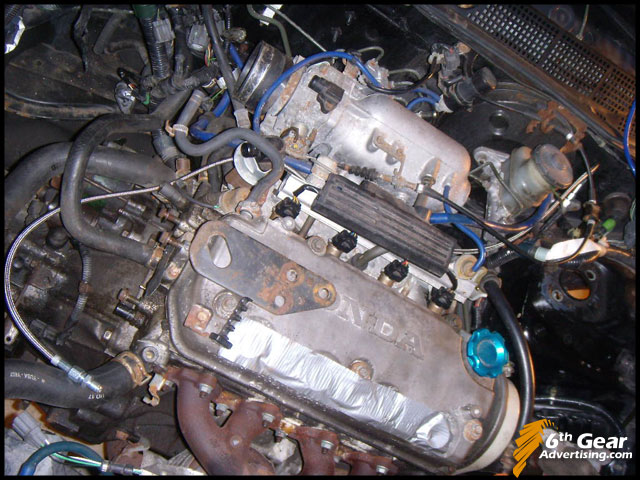
My car is a 1996 Civic Hx with the D16y5 vtec-e engine and CVT transmission.
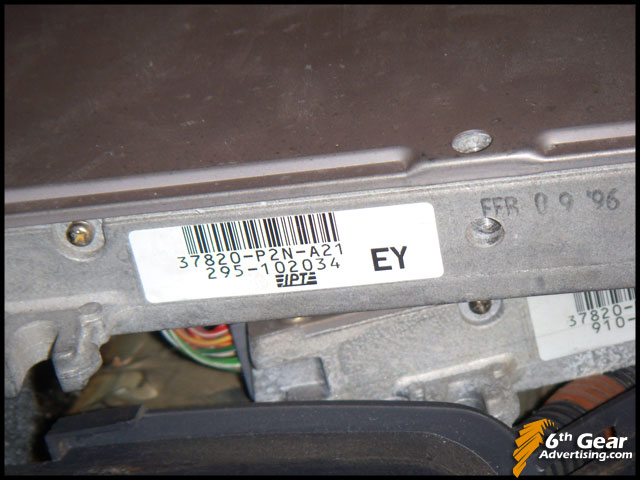
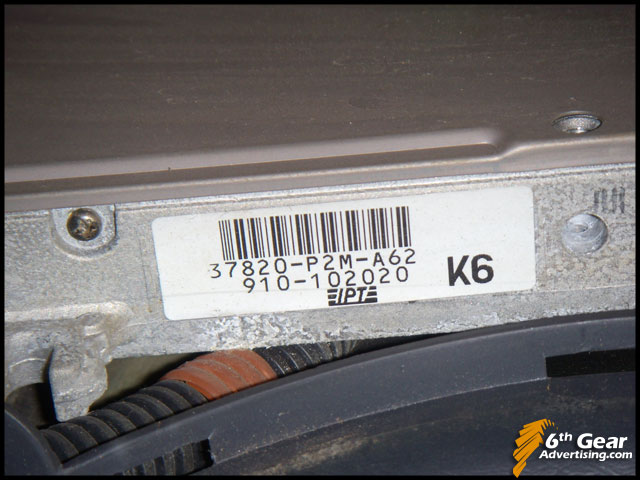
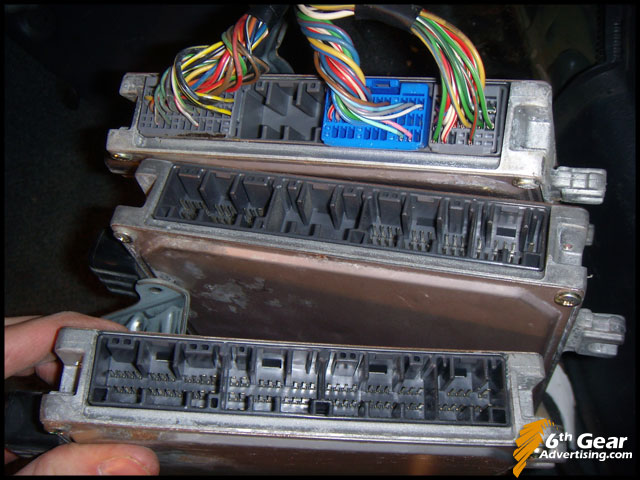
A little background... this was the first year that Honda used a Continuously Variable Transmission in the Civic. The automatic HX's came with the CVT tranny instead of a traditional automatic. They are known for shaking when accelerating from a stop. Mine was doing this when I bought at (104k mi) I had the car at the dealership for some emissions warranty work, and they gave me a quote on the transmission. $800 total, $300 for a new start clutch, $500 labor. I decided I would convert it to manual since I had a spare 5 speed & shift linkage already. I had originally planned to swap in a spare automatic tranny I had, but after looking into it more I realized it was not an option. Yes any 92-00 D series automatic tranny will bolt up to the D16y5 (hx) motor. However, the D16y5 head is a vtec-e head (lean burn mode) which achieves greater miles per gallon. The only 2 ECU's that are avail for the HX motor are for the manual (P2N) and the CVT (P2M). The P2M ecu for the CVT will not know how to operate with a normal automatic tranny. An ecu from an automatic dx/lx/ex will not be able to control the lean burn mode operation of the HX head.


So your options are:
1. Replace or repair the tranny (easiest but may be expensive)
2. Convert to 5 speed manual
3. The only way to use a regular auto tranny would be to use a head other than the hx head (d16y7 or d16y8) along with the correct ecu for the head & tranny. You will lose the extra MPG that vtec-e gives, and have some extra wiring issues. Also, I'm not even sure what components from the CVT civic are compatible with a regular automatic.

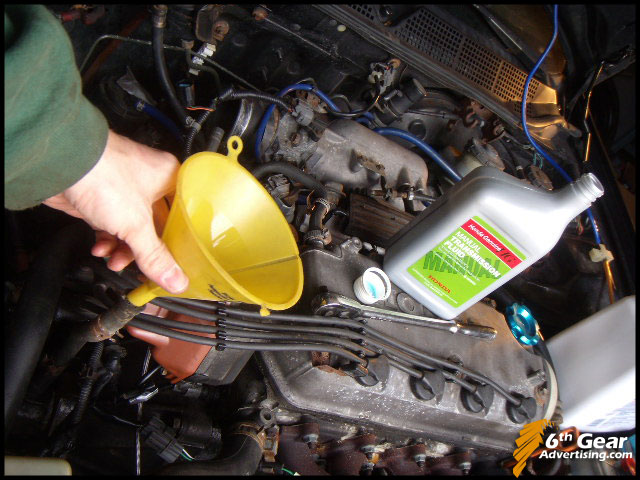
So before you consider converting to manual, try flushing out the CVT transmission. The fluid may need to be changed, or someone may have put regular automatic tranny fluid in it, instead of the CVT fluid. These issues can cause the slipping. The CVT fluid is expensive, but it is well worth the investment before you convert.

You will need enough fluid to refill it once, drive it, and then drain & refill it again. Just one refill is not enough to flush all of the old fluid out, because some of it stays in the transmission. When you drain the fluid, look for metal particles in it, that would make me lean toward converting. If the transmission is slipping for too long, it will begin to wear out.

The CVT is not easy to find used, and very expensive from Honda. The $300 start clutch is designed to be replaced. Looking back, I would have gone that route after learning how much work it was to convert. I started collecting parts for the swap in fall/winter 2005. I was not in a hurry, so I collected them slowly on ebay when I found a good price. Since then, more people have been sharing information about these transmissions and how to flush them. Had I known it was that simple, I would have tried that first. But when I started, people were only saying how they were on their second or third CVT tranny, having the same problems every time. So I went with my original plan to convert since I had most of the parts already.

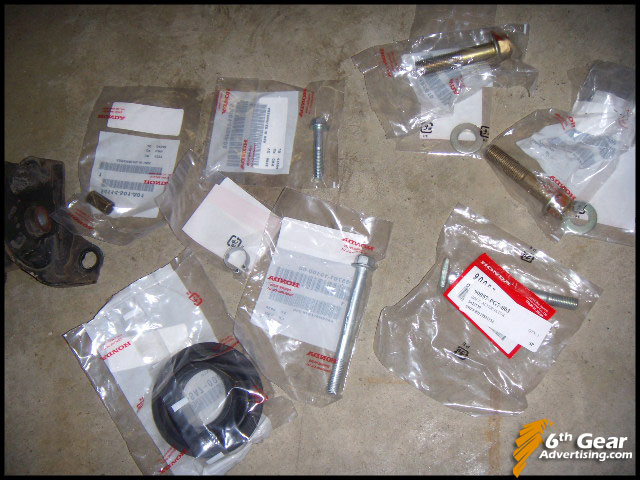
Parts you will need:
- 92-00 D series manual tranny
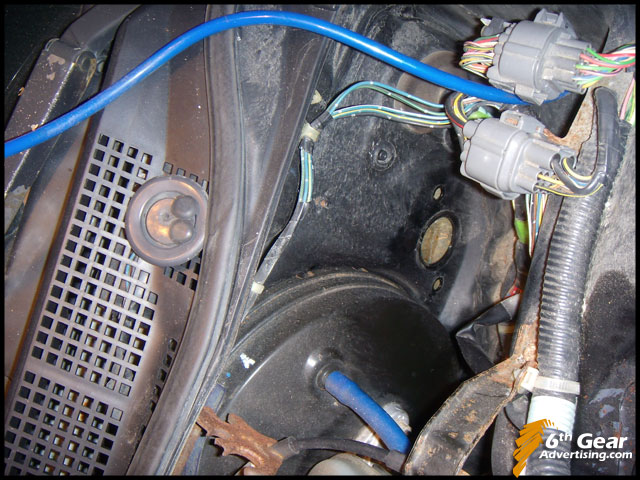
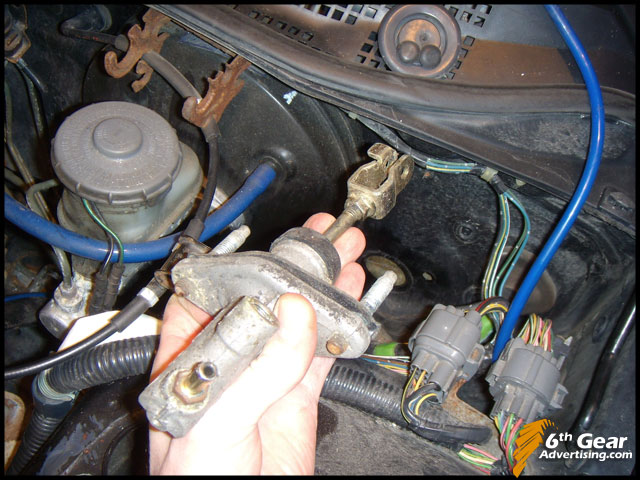
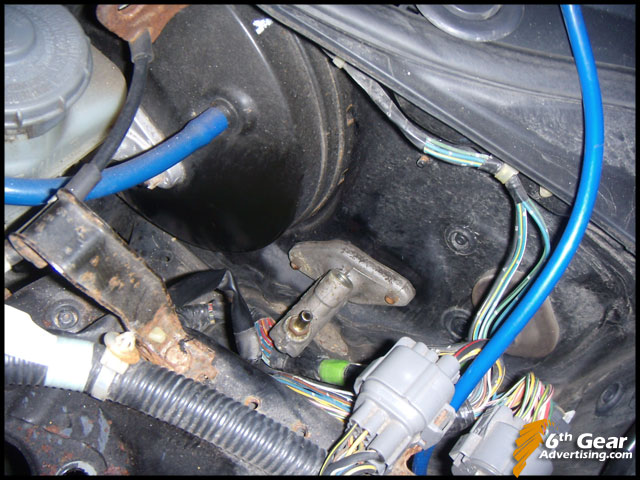
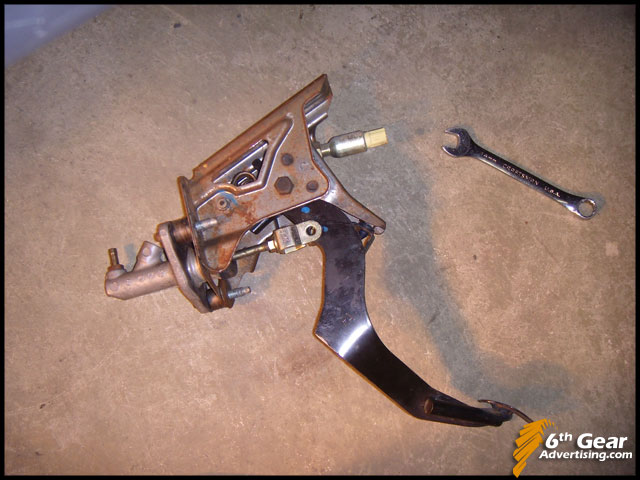
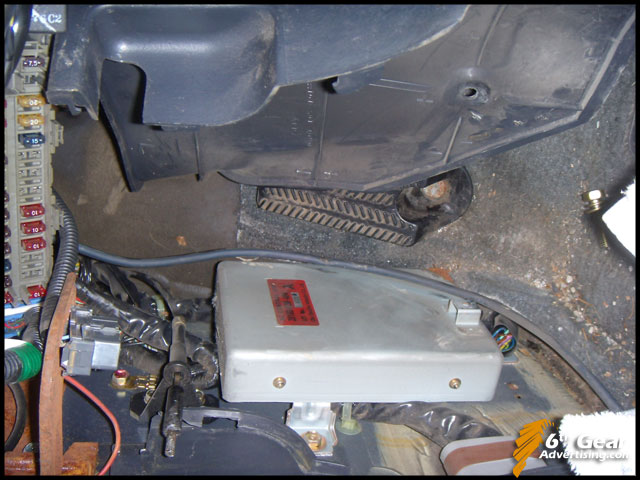
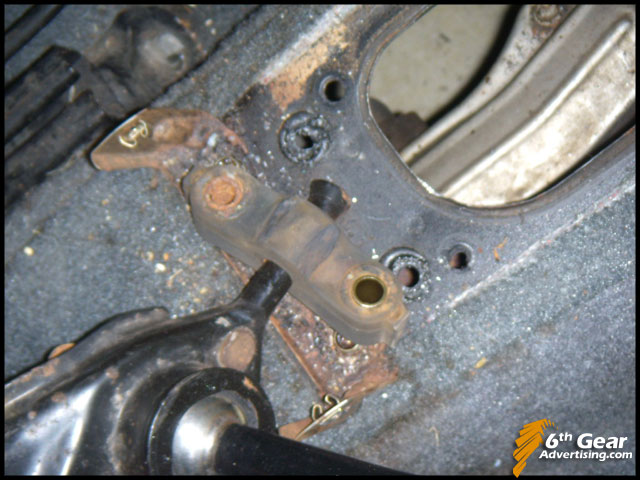
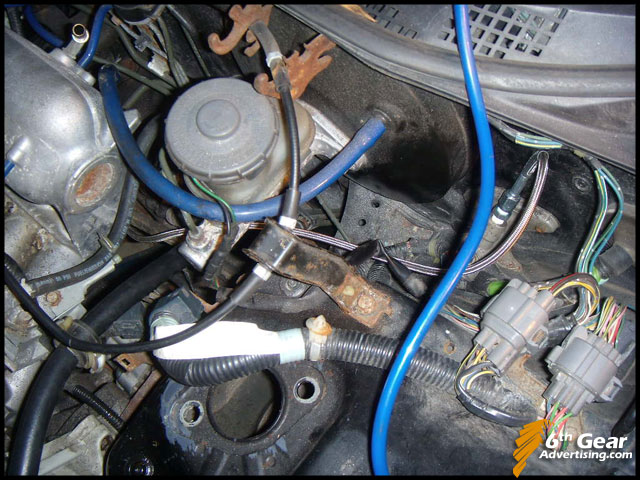
- 96-00 master cylinder, nuts
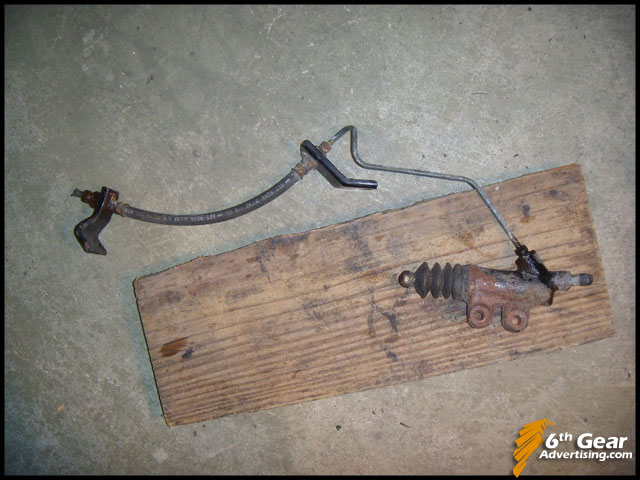
- 92-00 D series slave cylinder, bolts
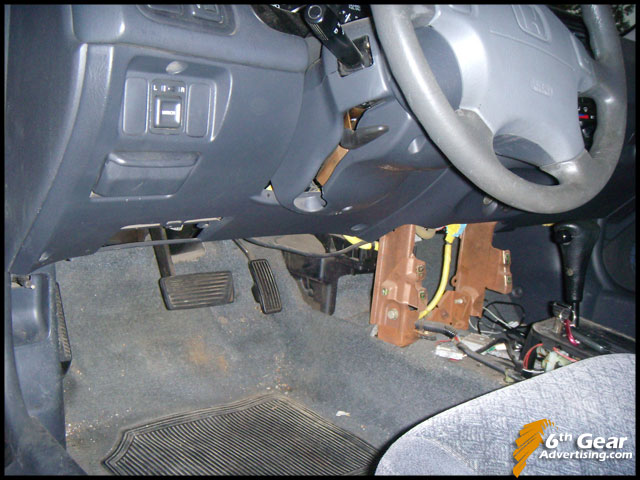
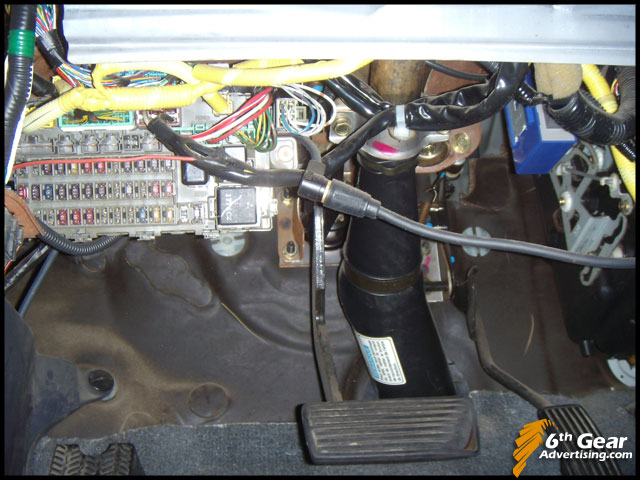
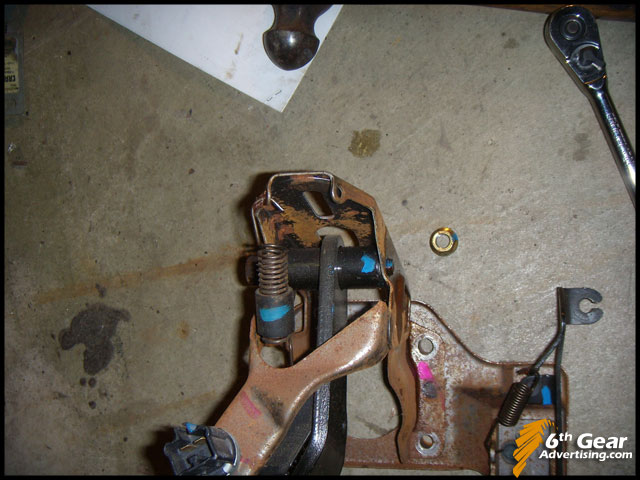
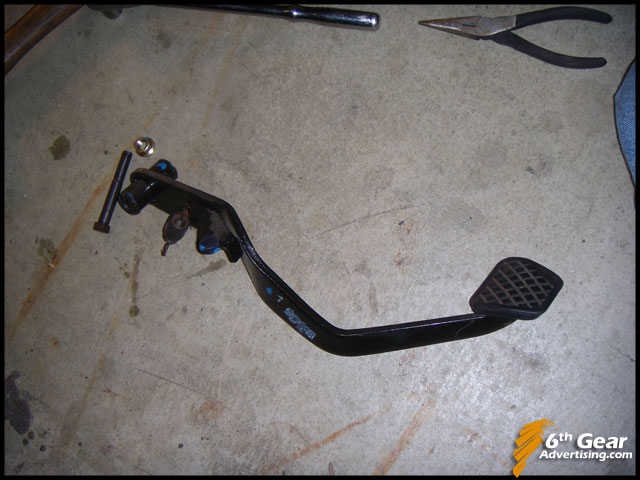
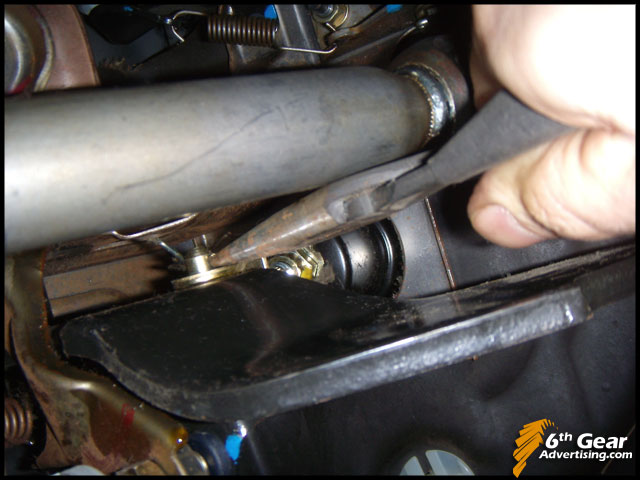
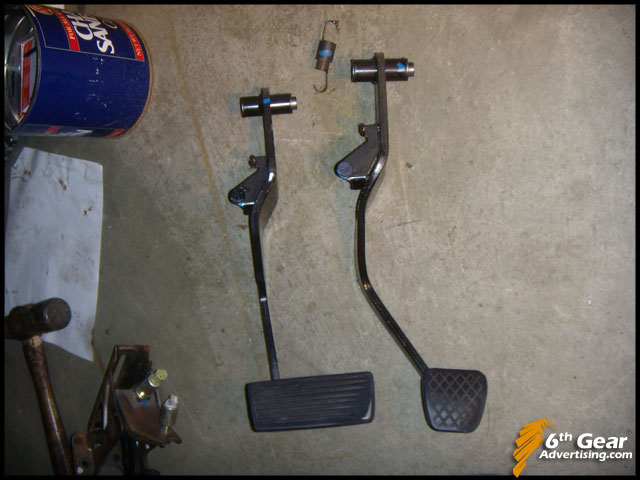
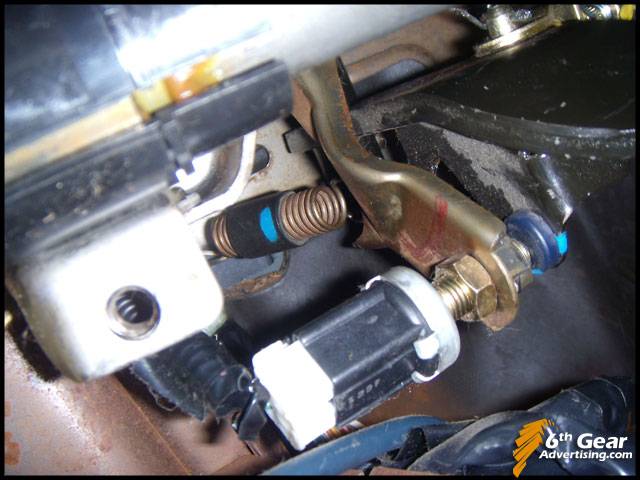
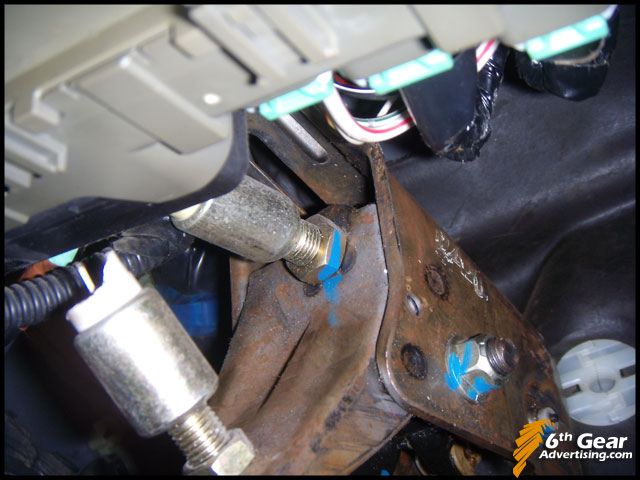
- 96-00 manual pedals, connecting pin
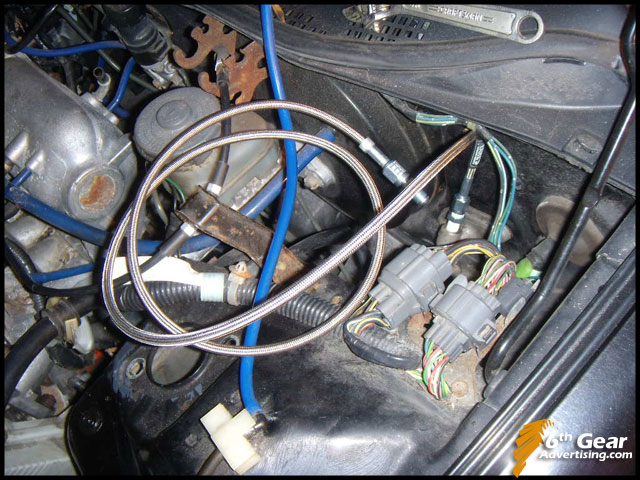
- 96-00 clutch lines, or the Earl's conversion ss braided clutch line
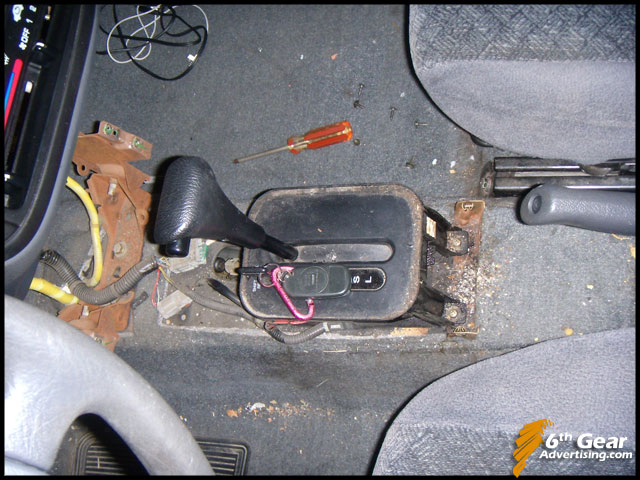
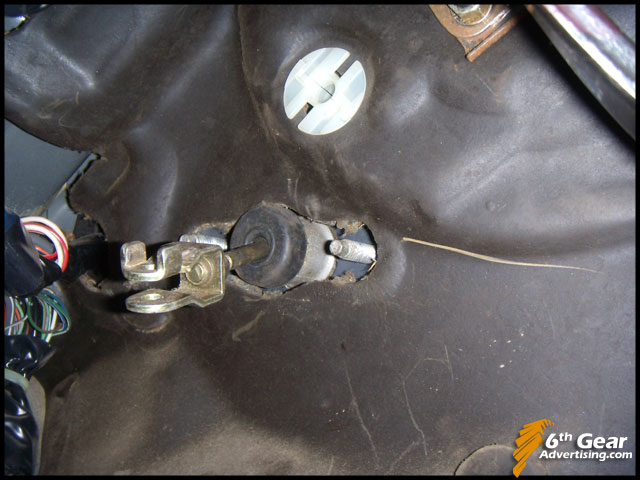
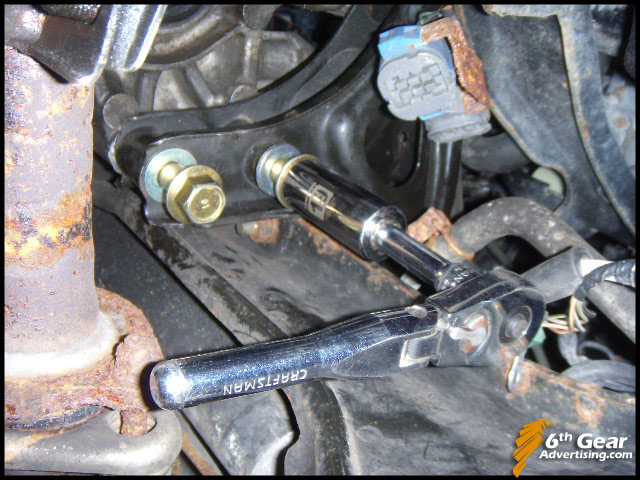
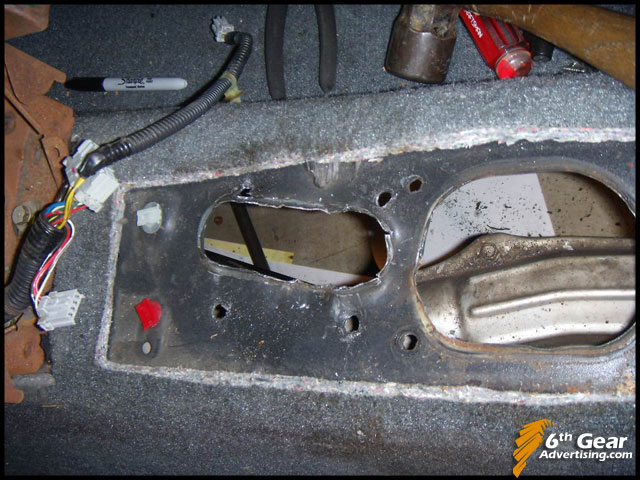
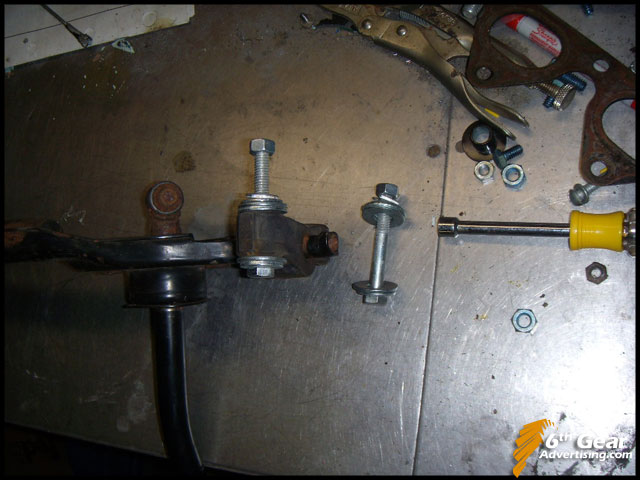
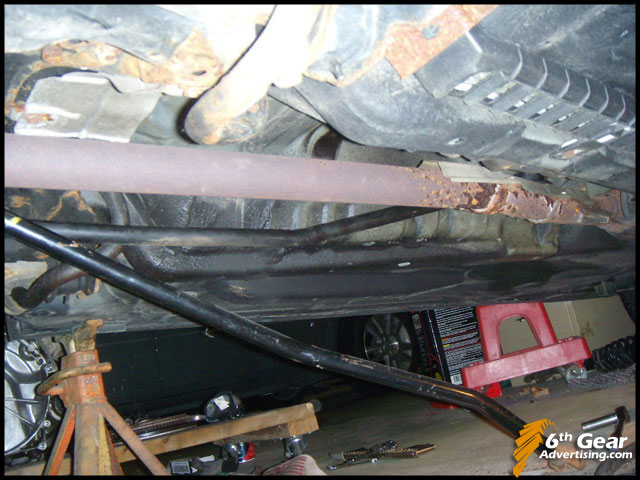
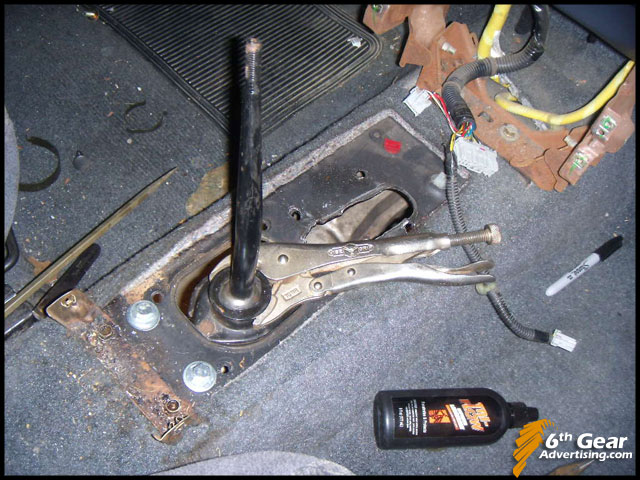
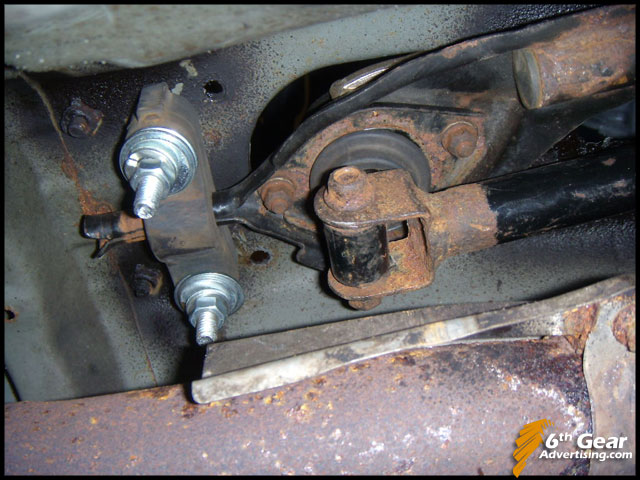
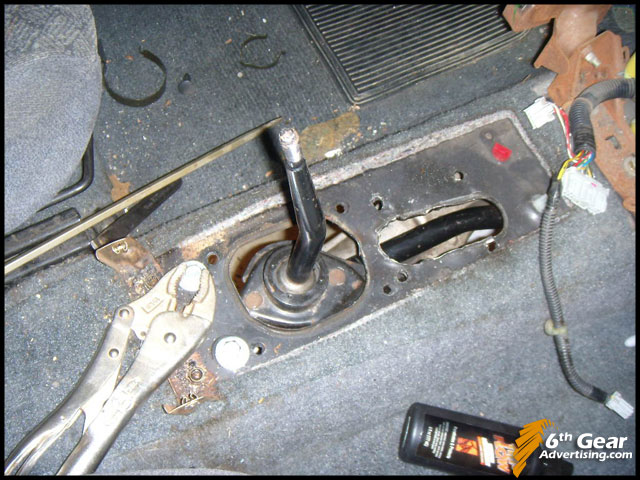
- 92-00 shift linkage, bitch pin, bolts, bushings
- 92-00 shifter, knob, dust boot
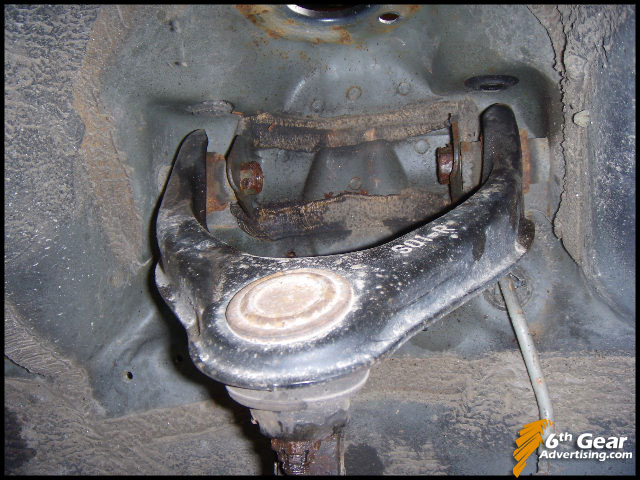
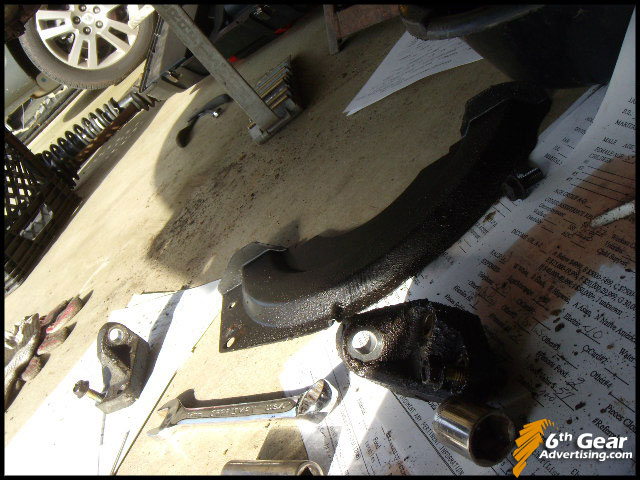
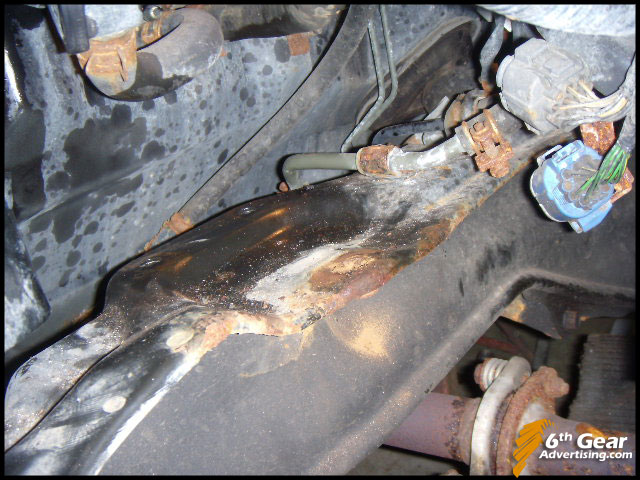
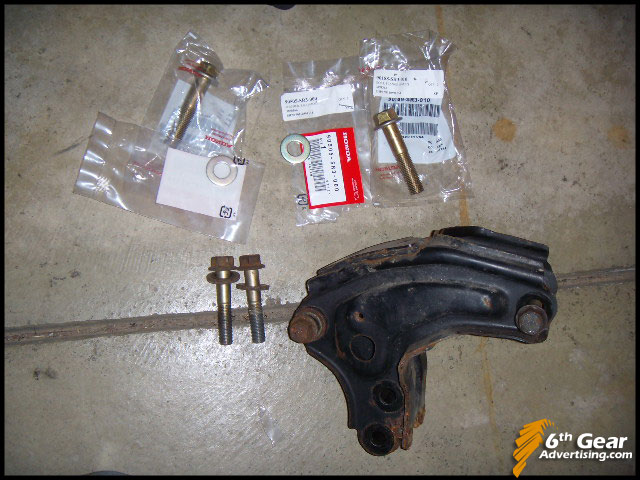
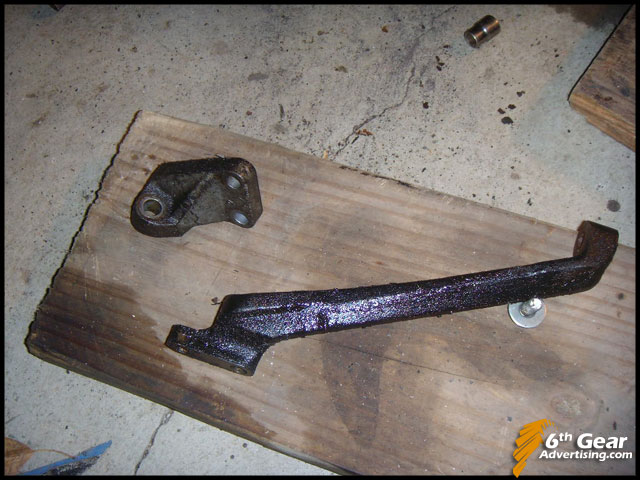
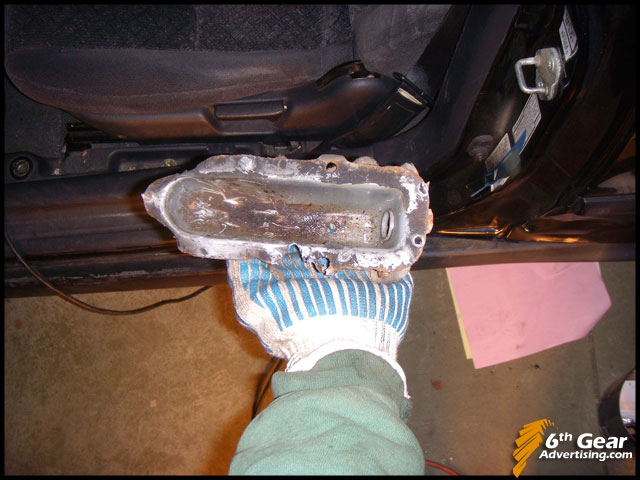
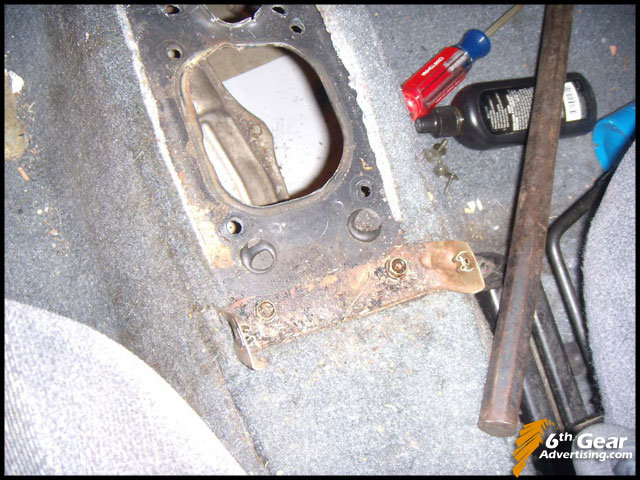
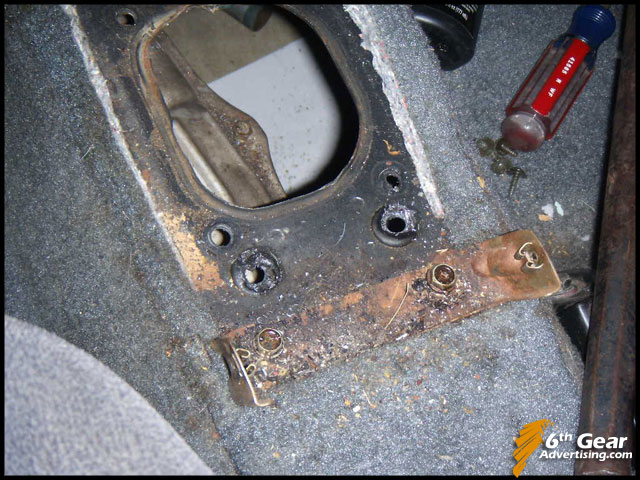
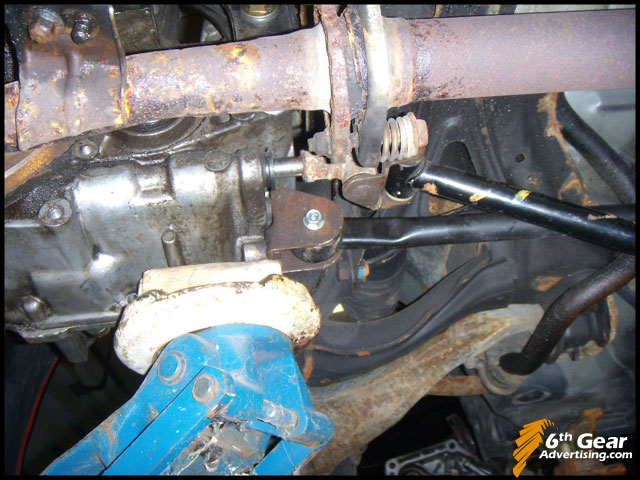
- 92-00 rear transmission manual mount
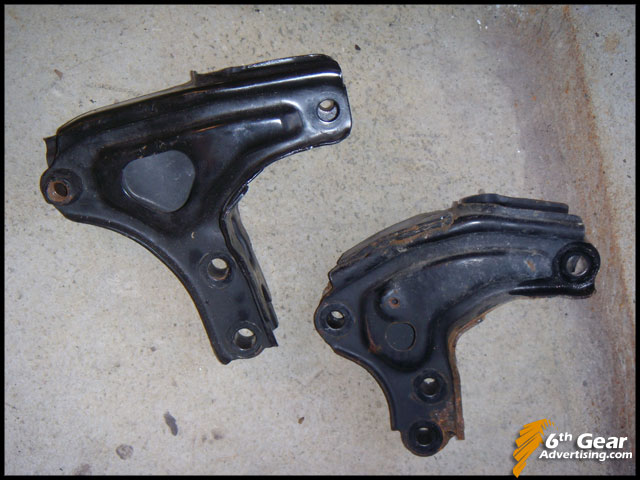
- 96-00 D series rear transmission manual bracket & bolts
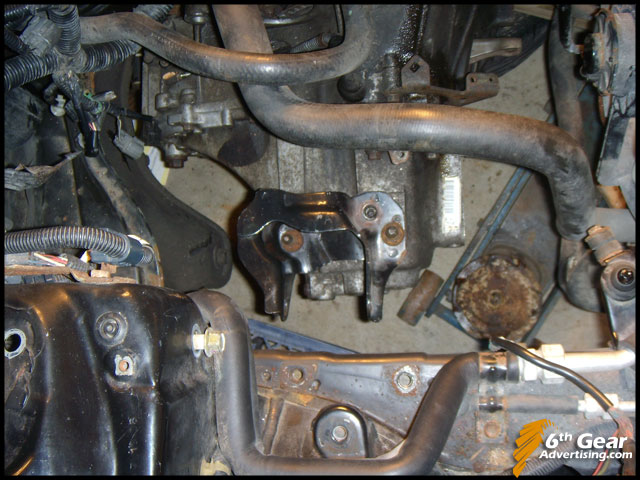
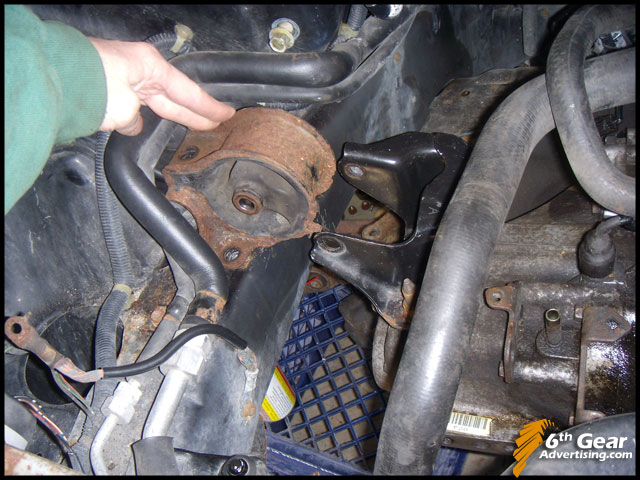
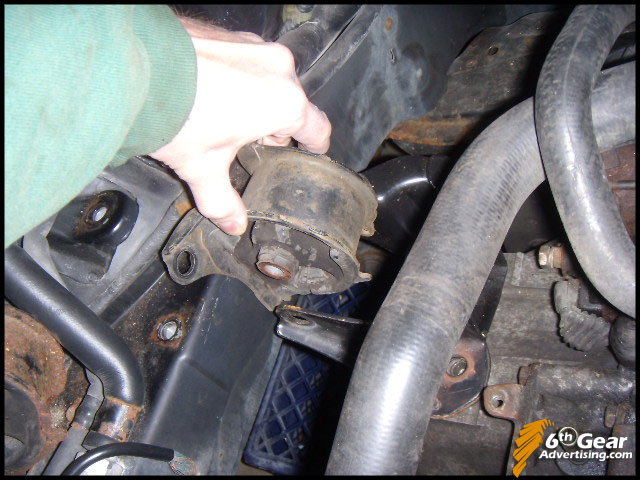
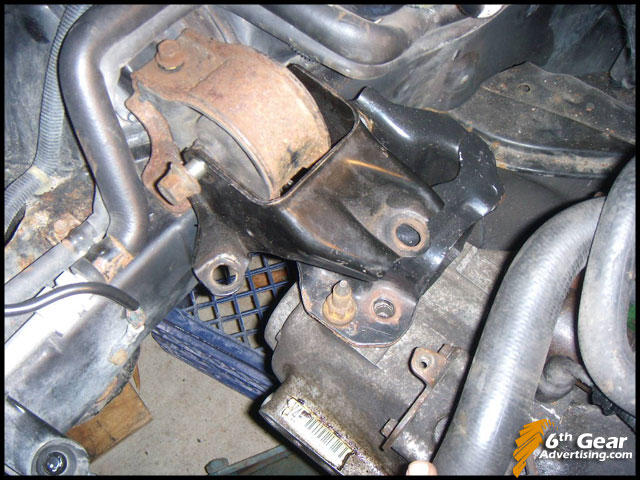
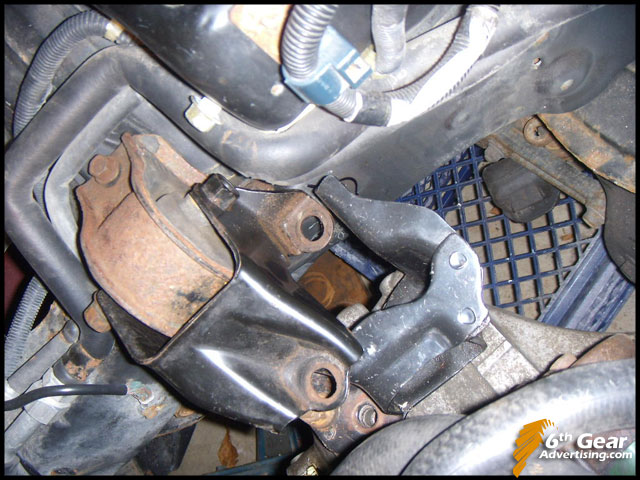
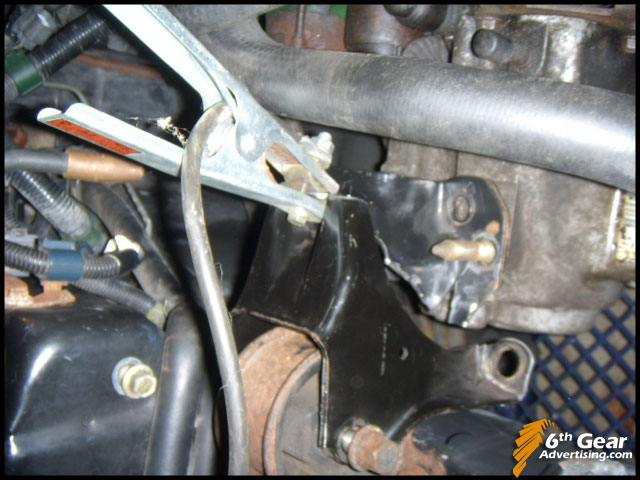
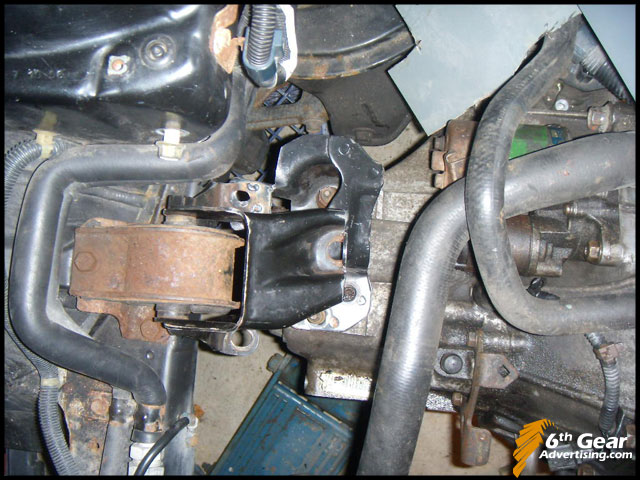
- 96-00 CVT passenger side tranny mount (re-use)
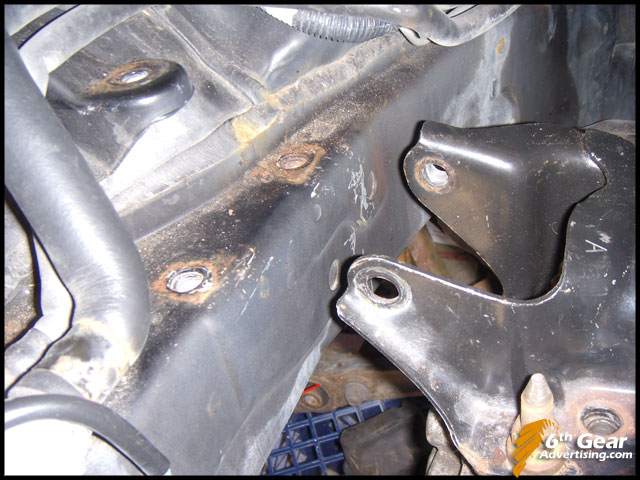
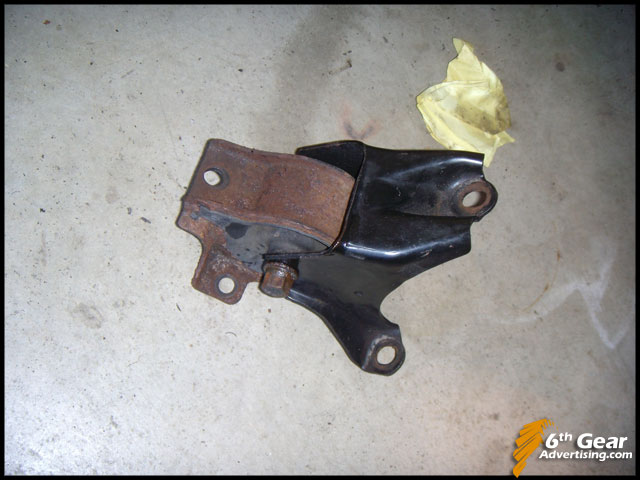
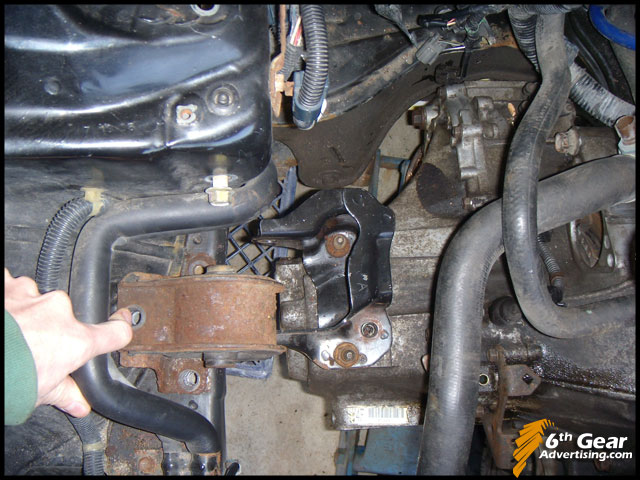
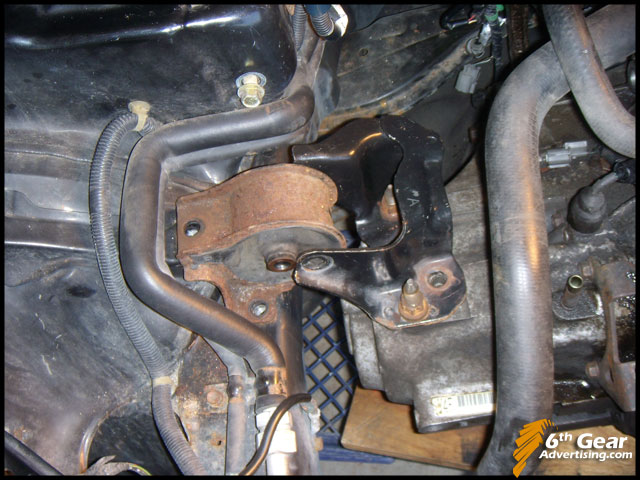
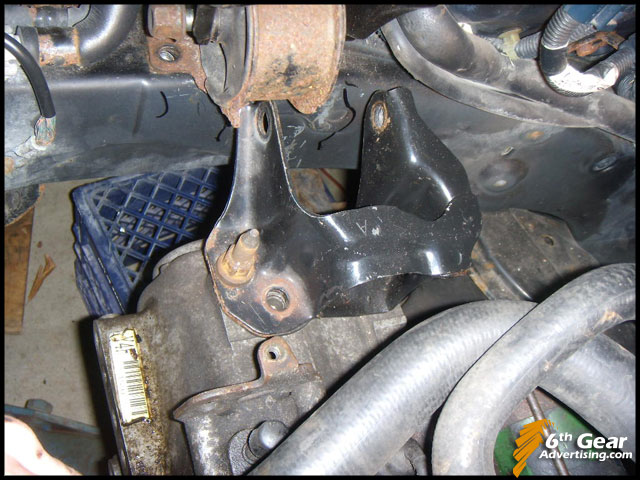
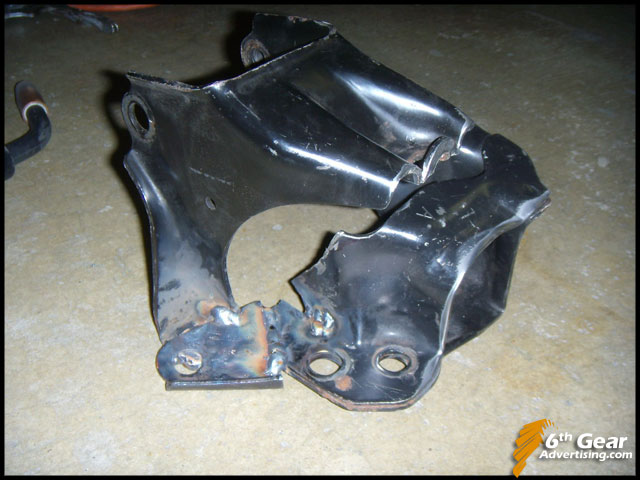
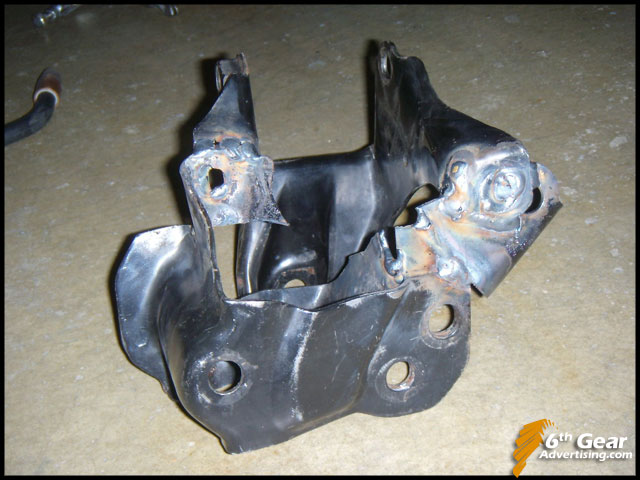
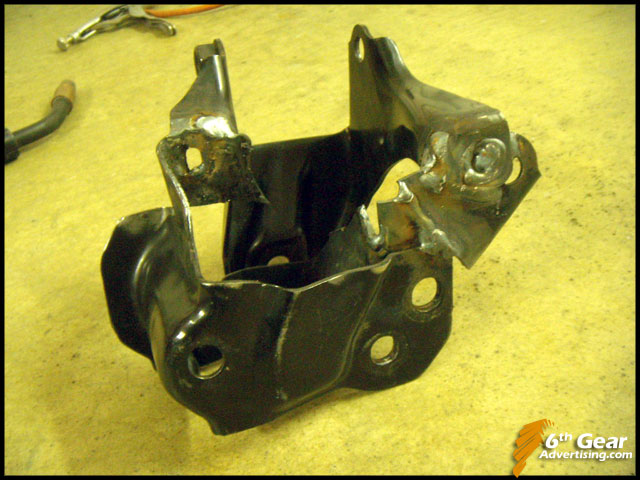
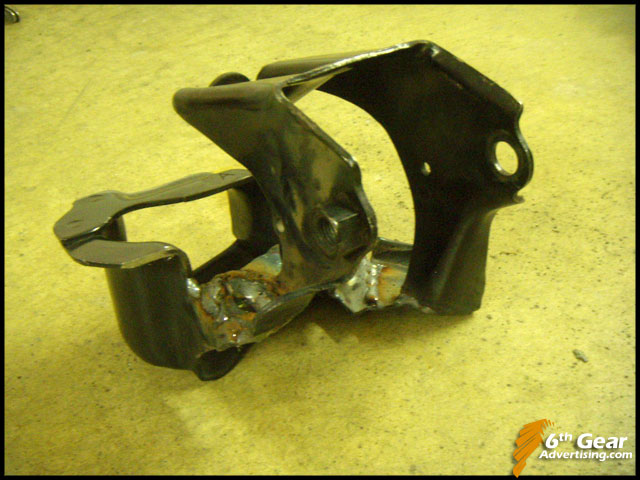
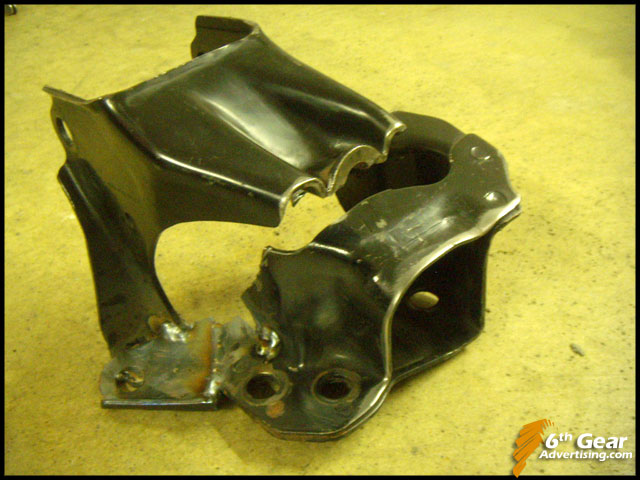
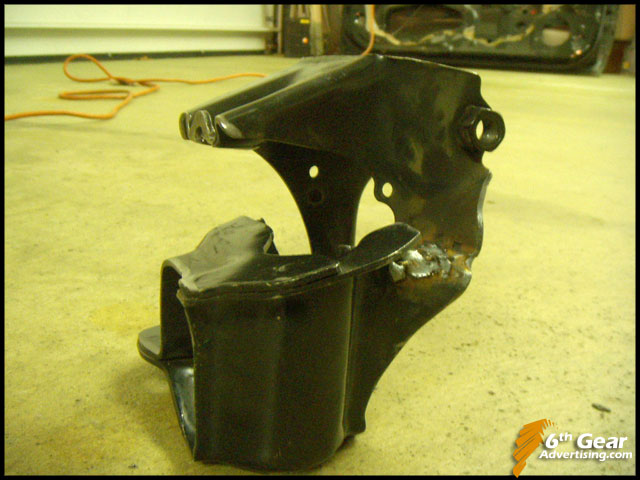
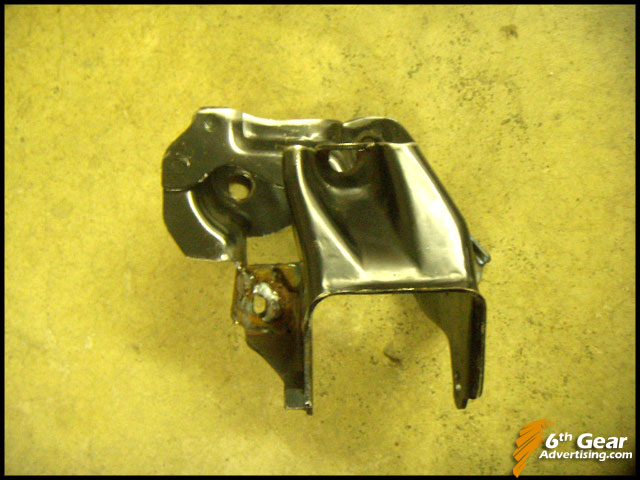
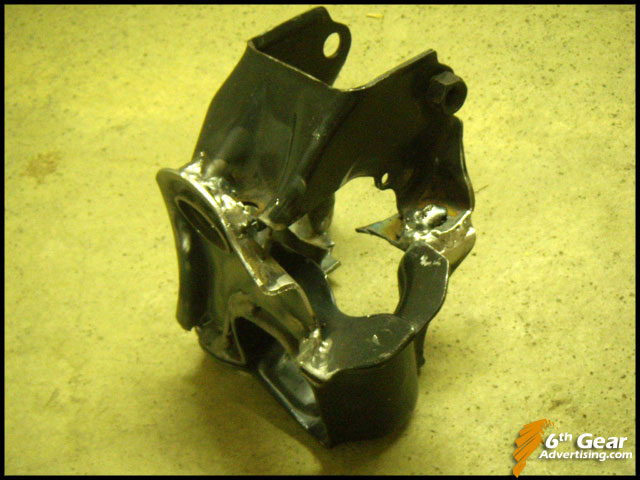
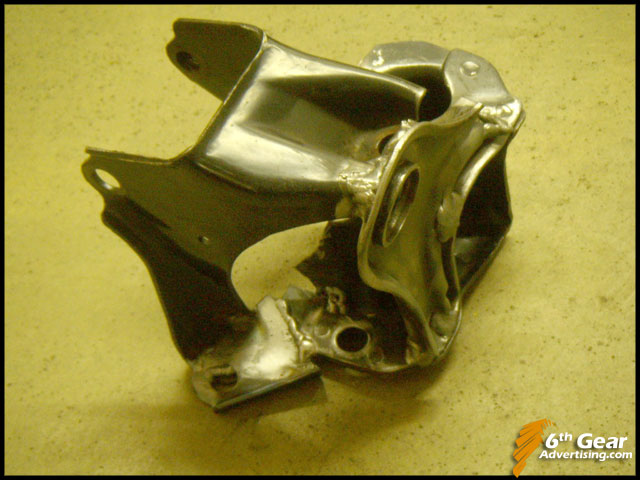
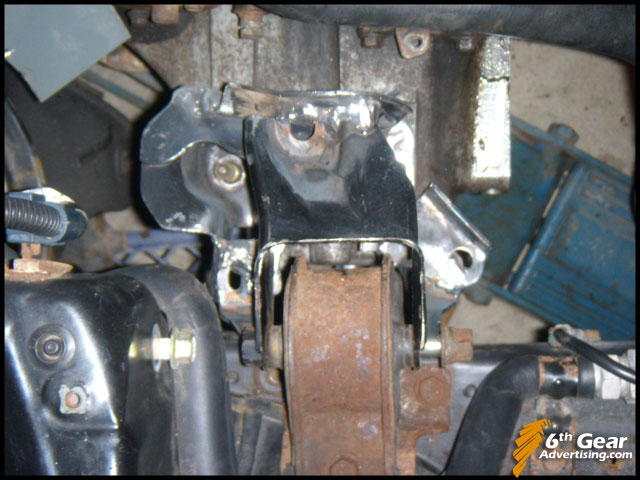
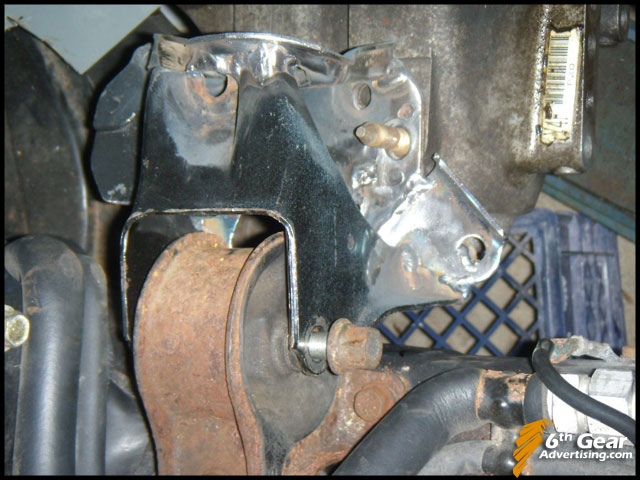
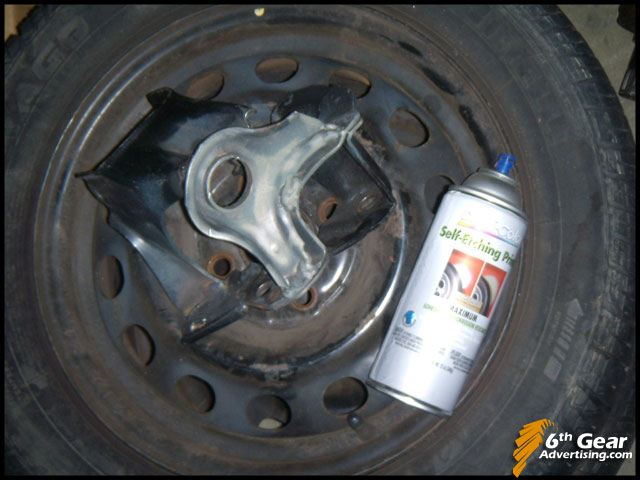
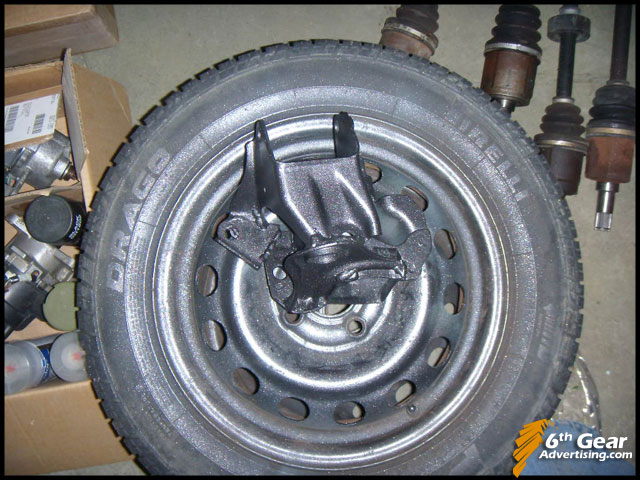
- custom passenger side tranny bracket (I combined a 96-00 D series manual bracket with a 96-00 CVT bracket)
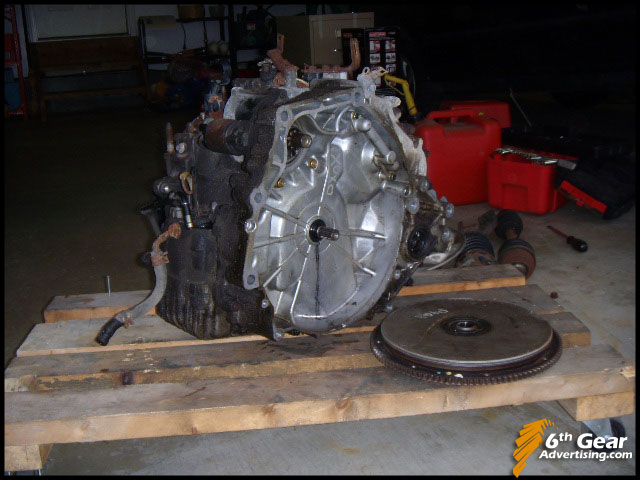
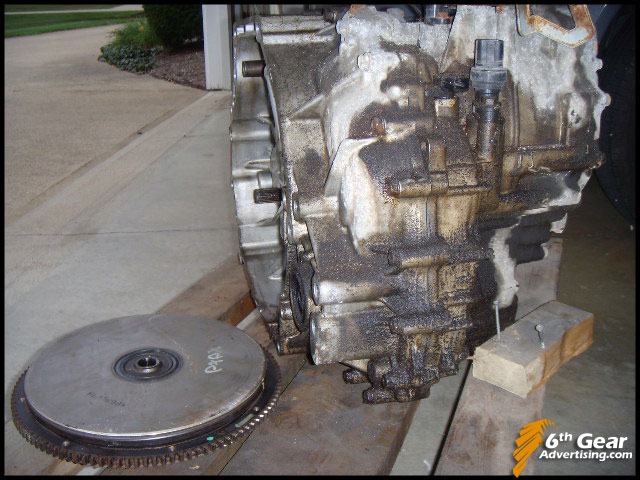
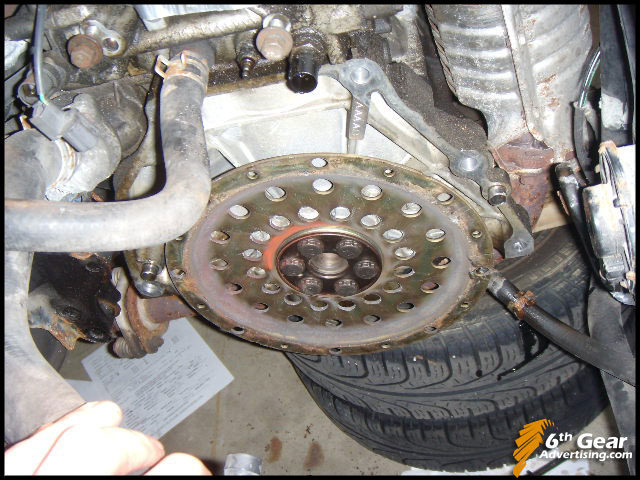
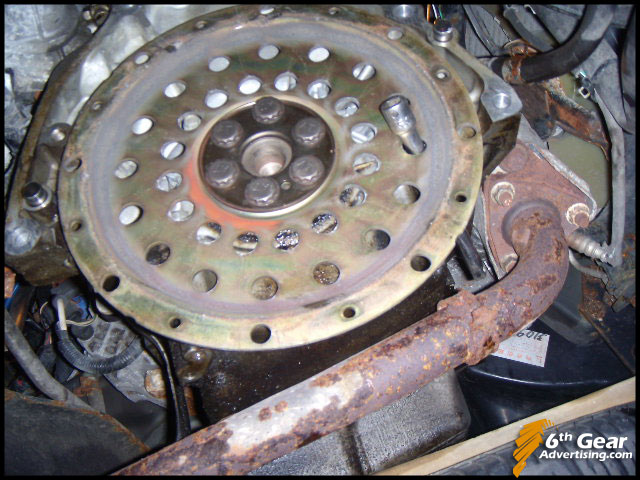
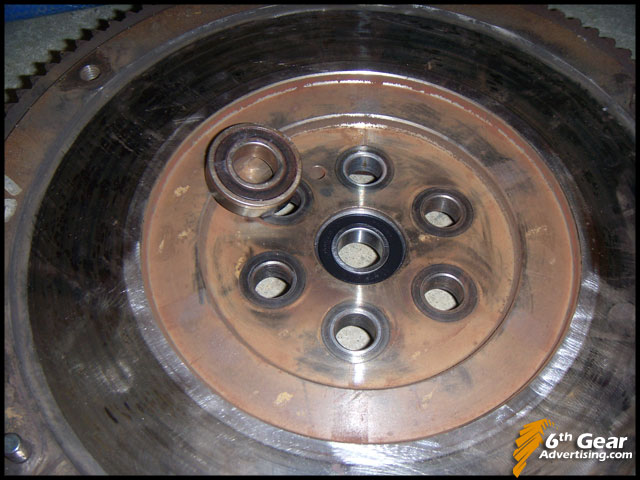
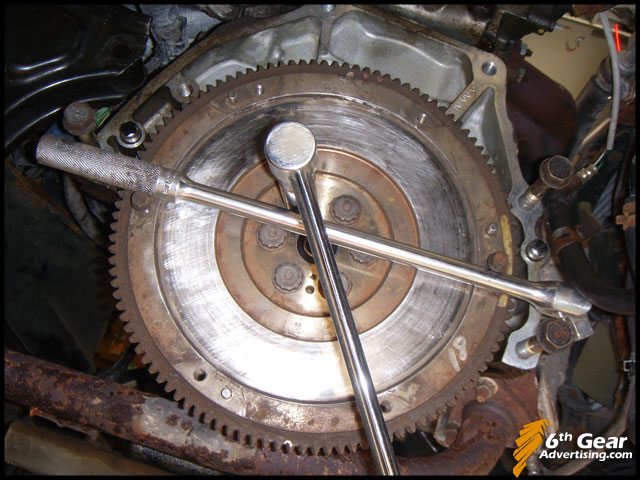
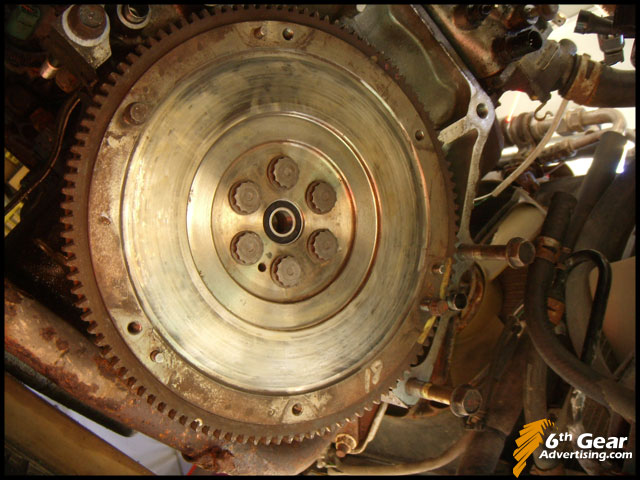
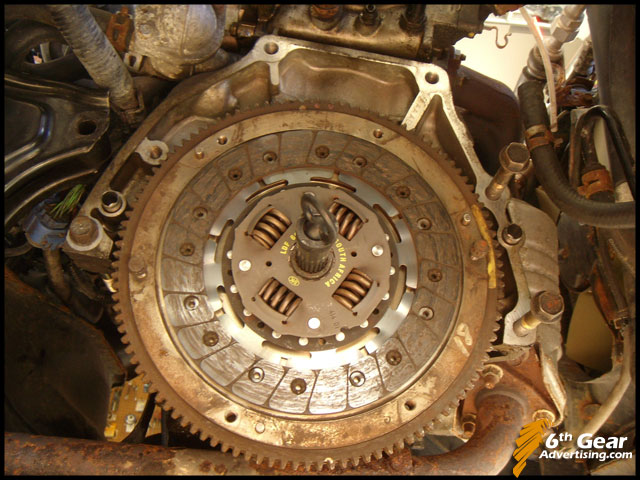
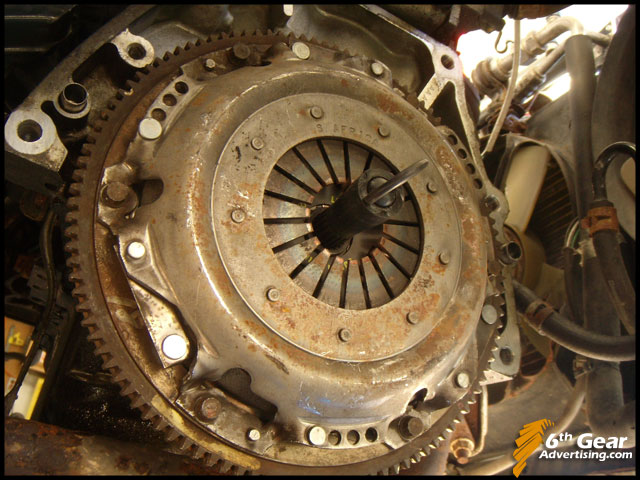
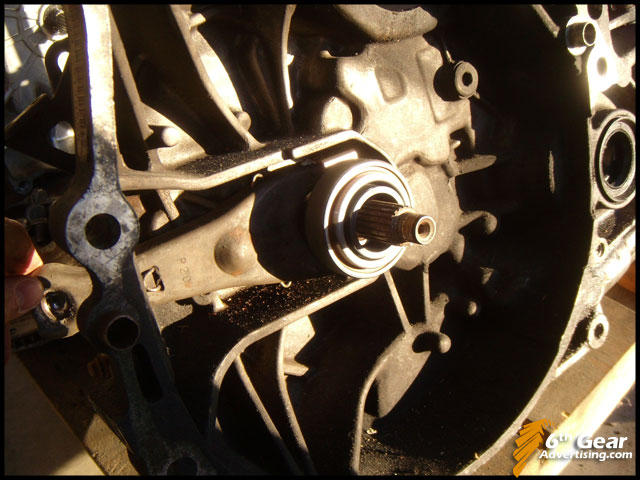
- 92-00 D series Flywheel & Pilot Bearing
- 92-00 D series Clutch & Pressure Plate
- 92-00 D series Release Bearing
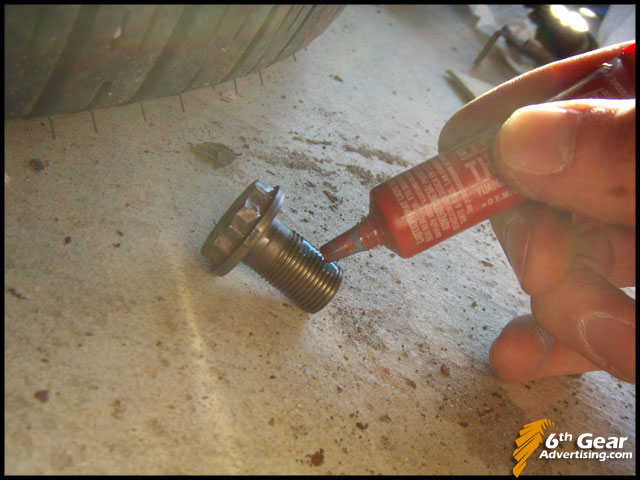
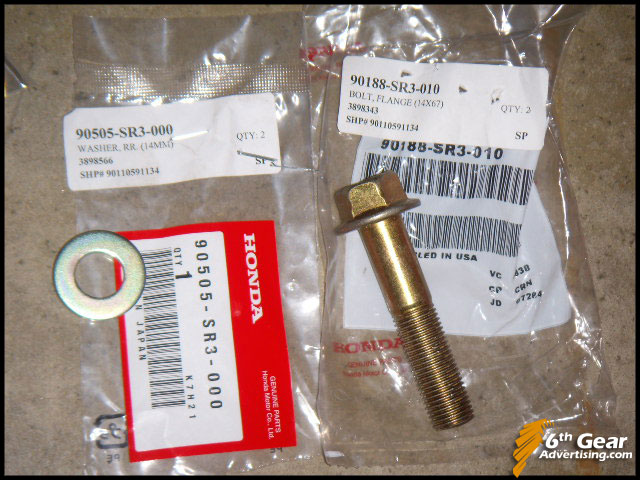
- 92-00 D series Manual Flywheel bolts (auto ones are too short)
- 92-00 D series lower front tranny bracket & bolts
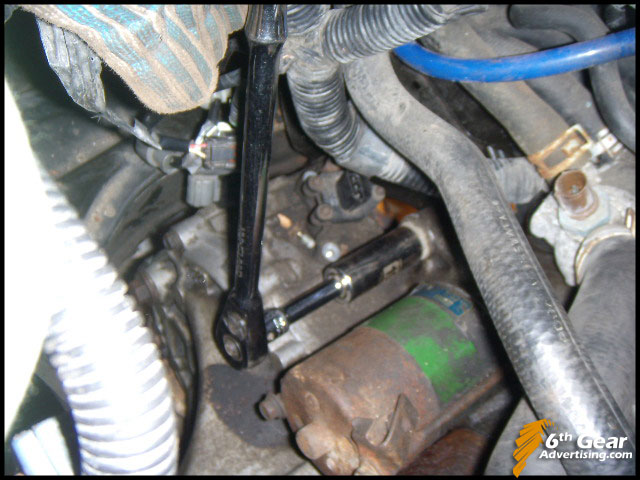
- 92-00 D series manual starter & lower long starter bolt

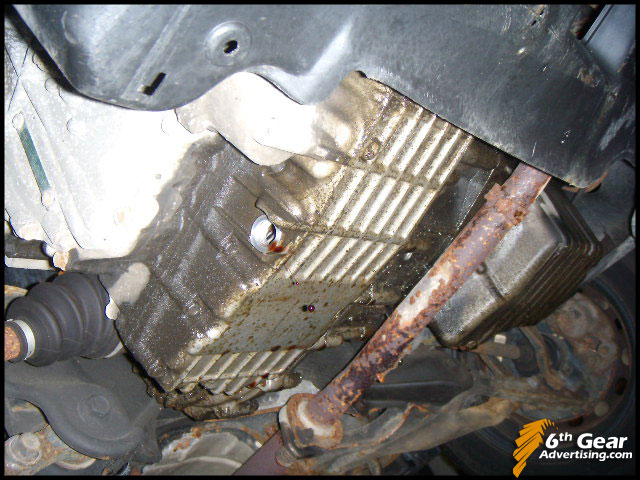
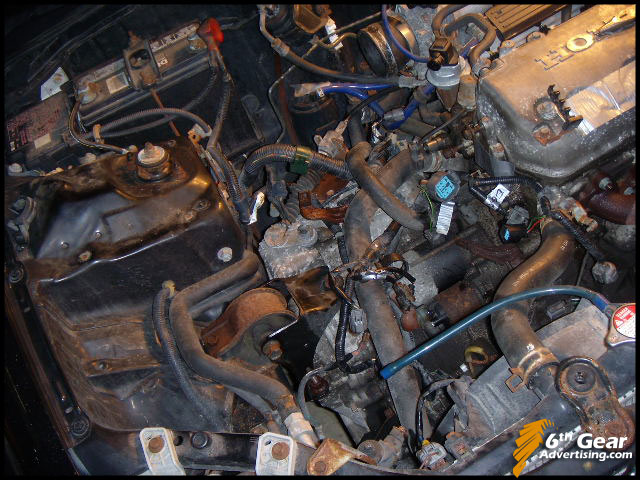
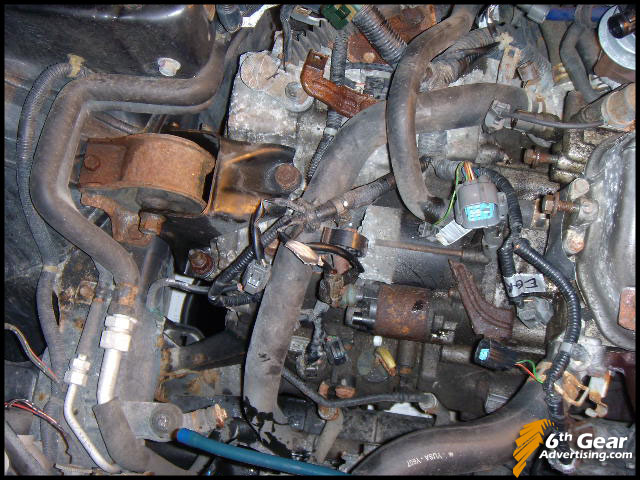
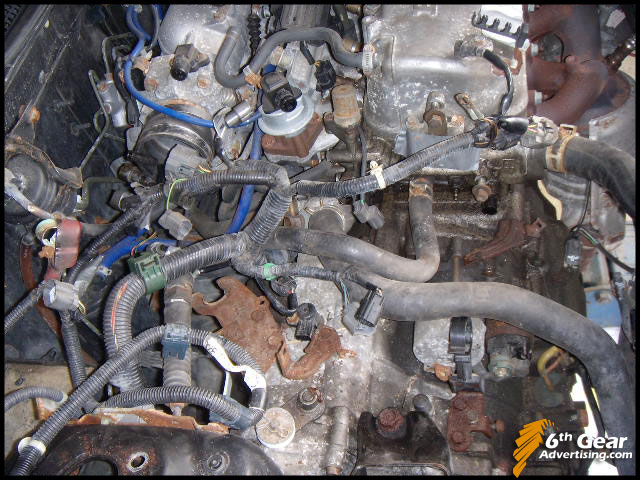
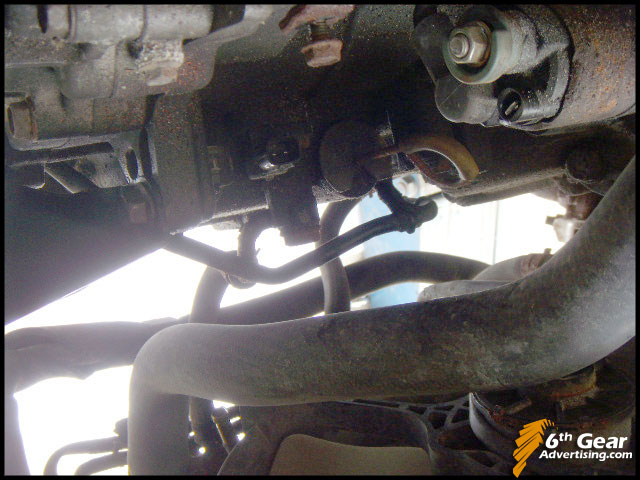
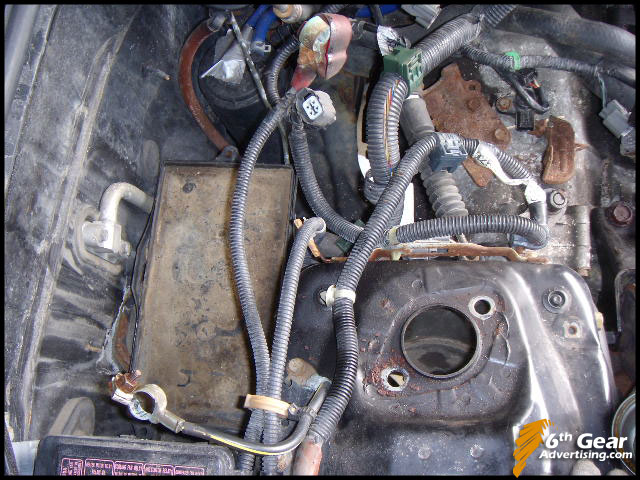
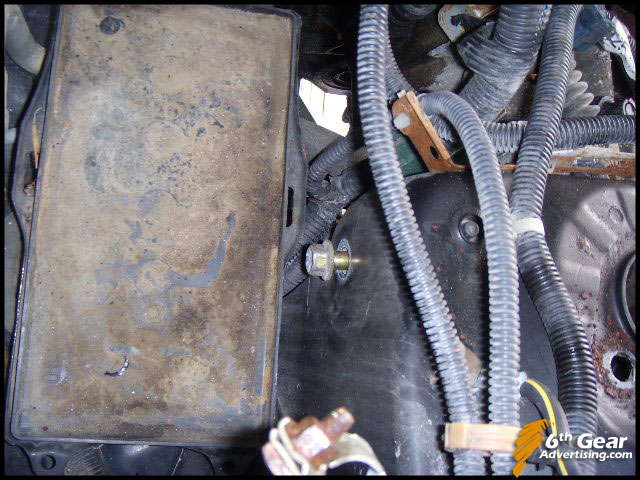
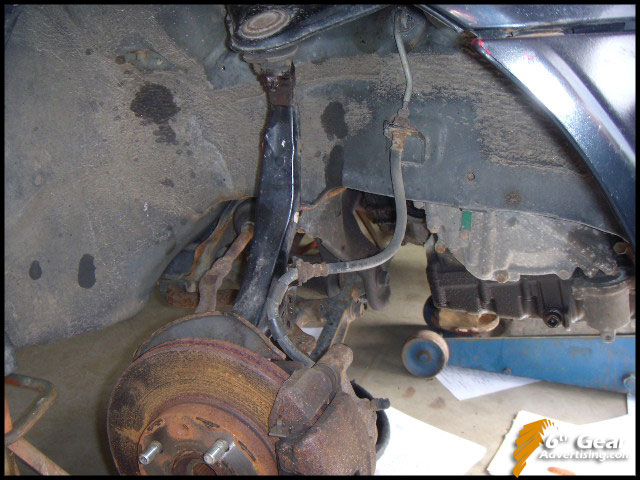
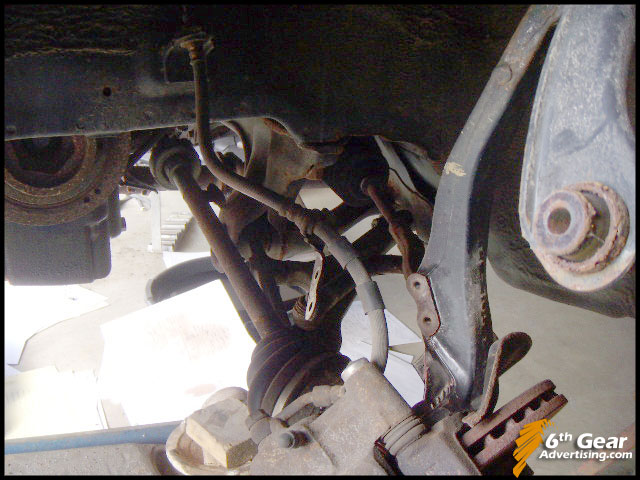
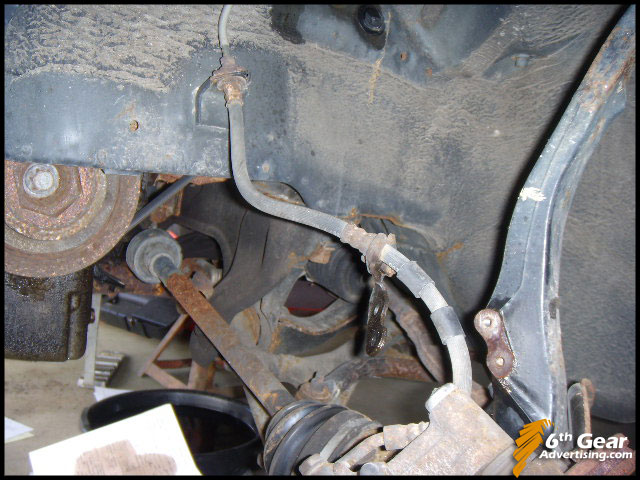
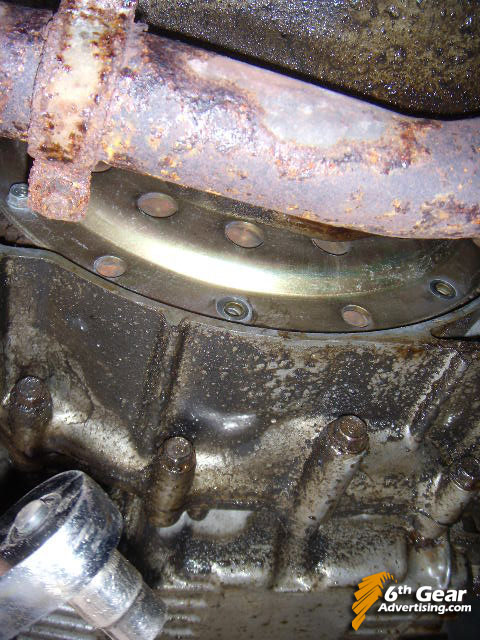
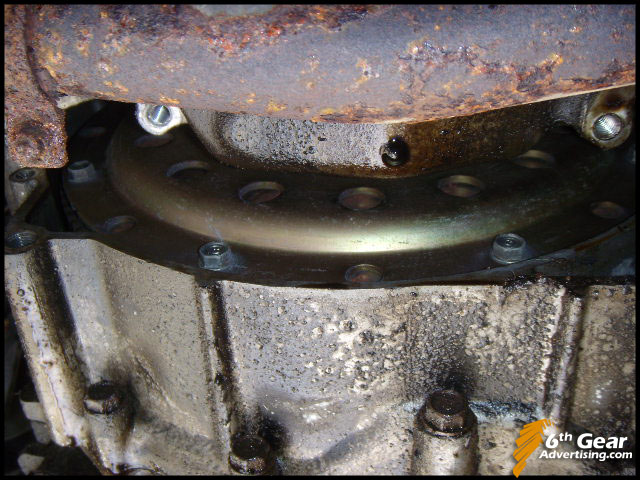
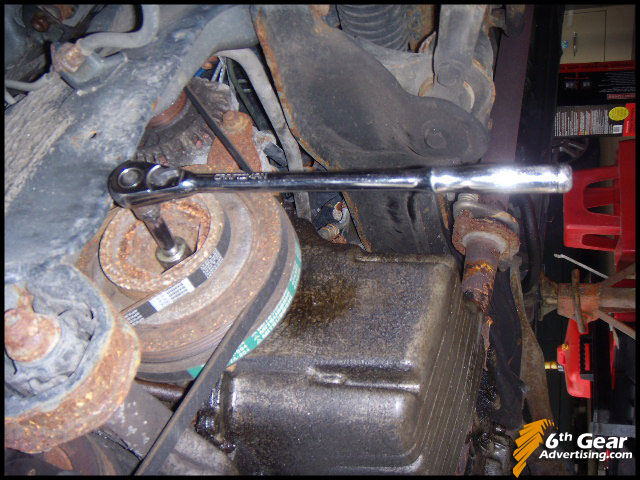
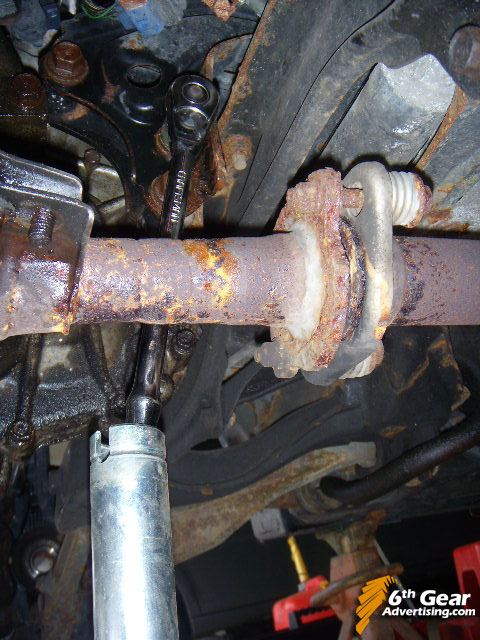
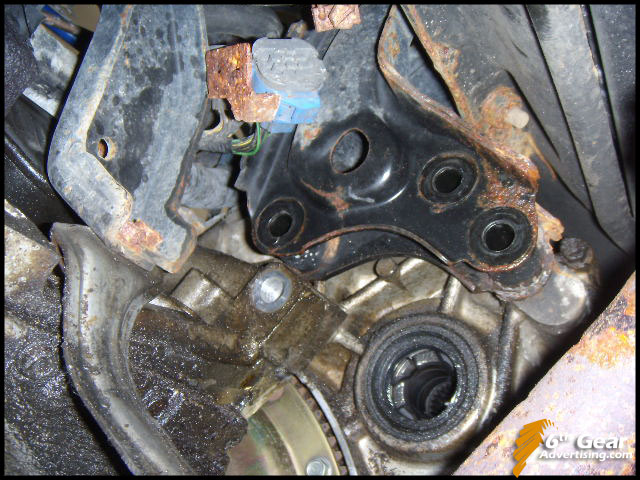
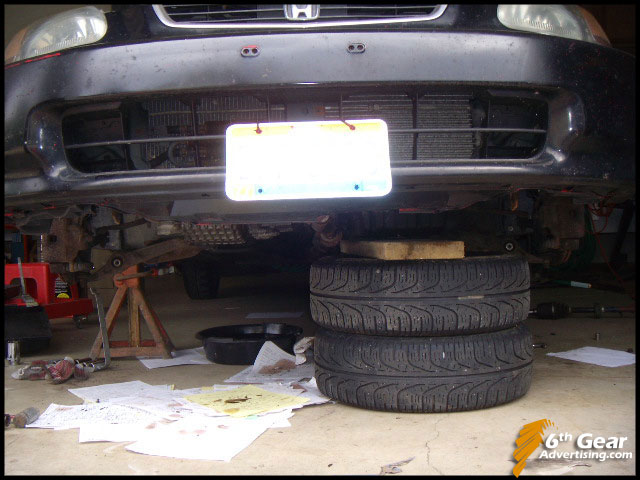
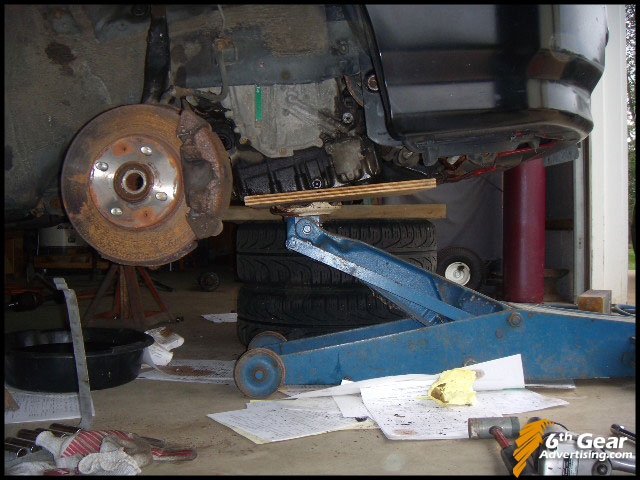
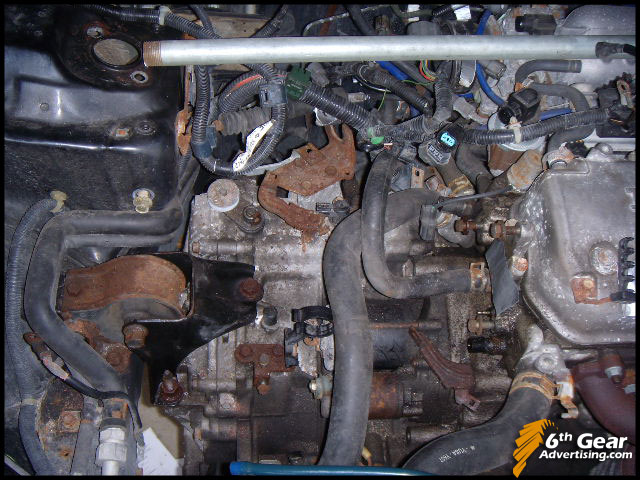
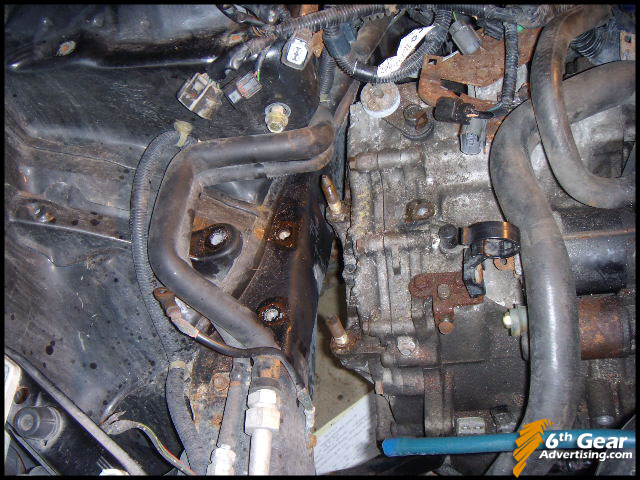
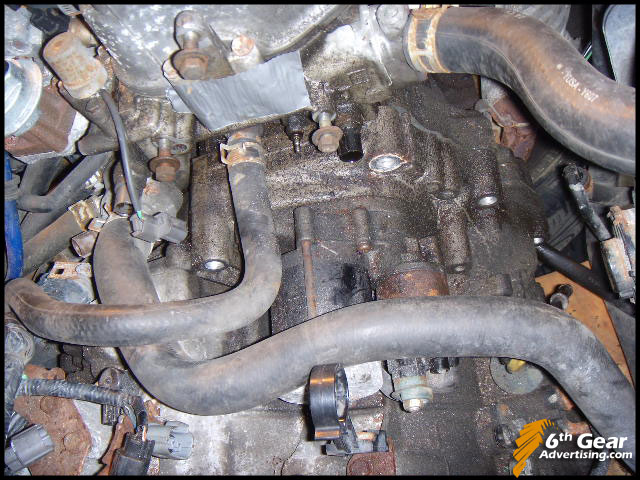
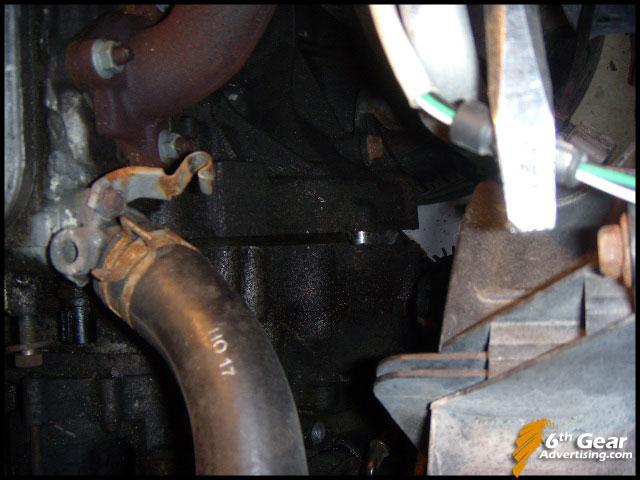
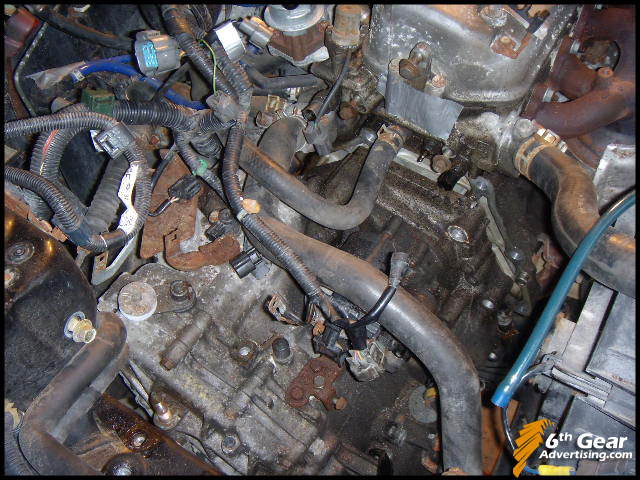
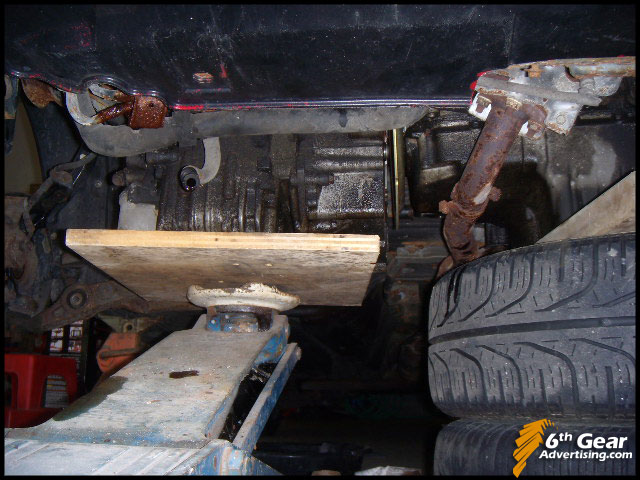
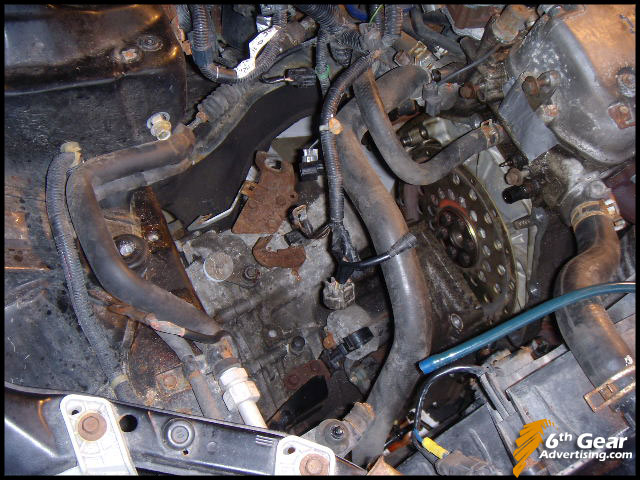
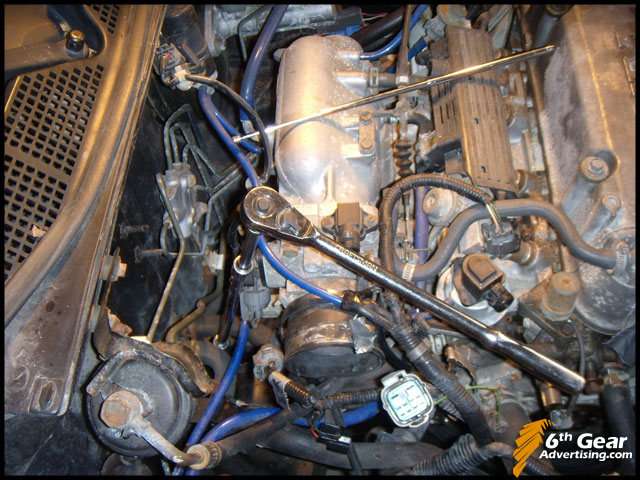
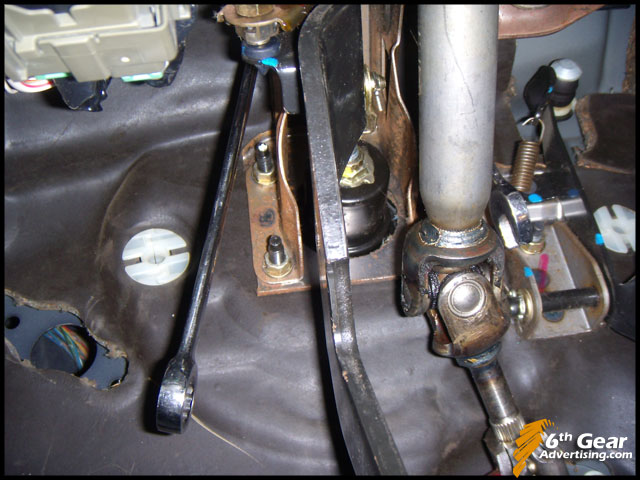
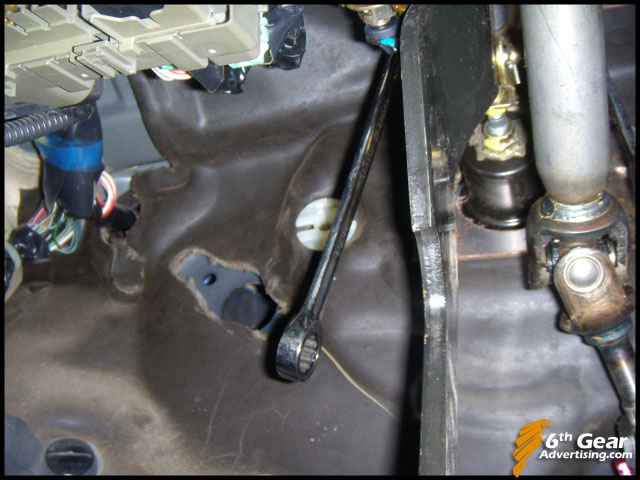
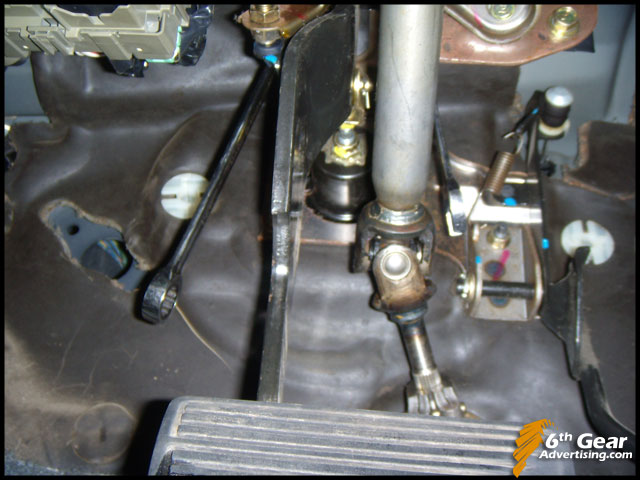
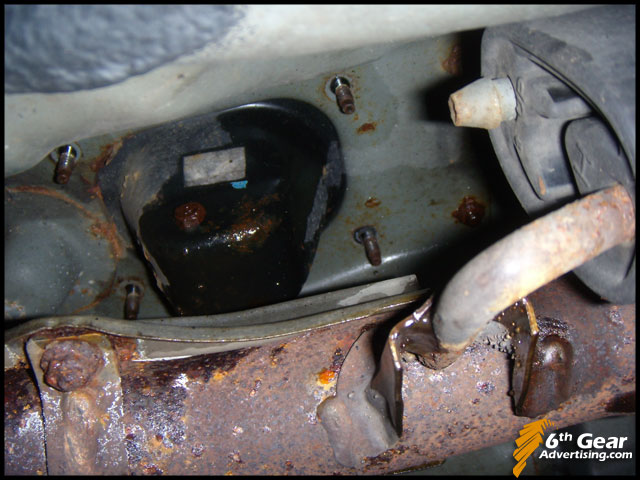
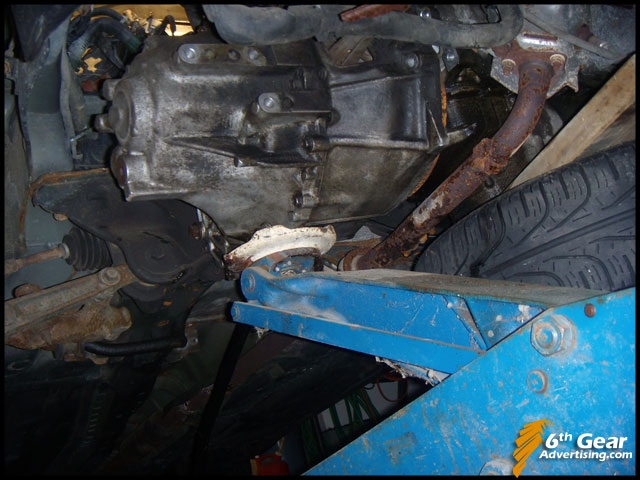
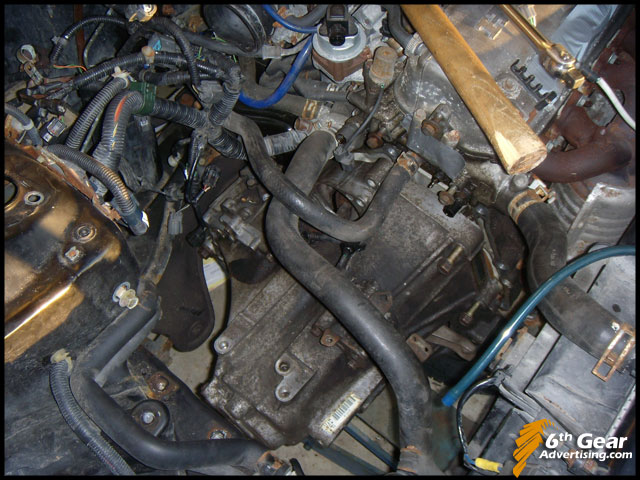
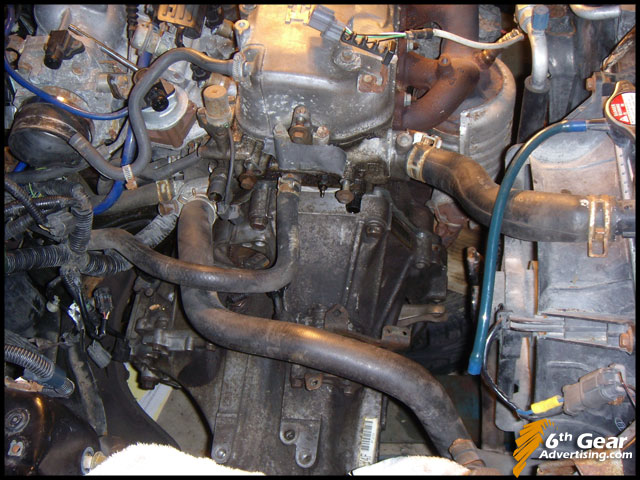
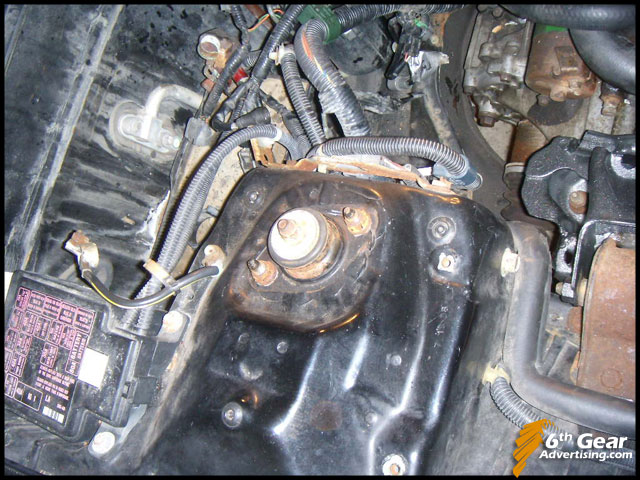
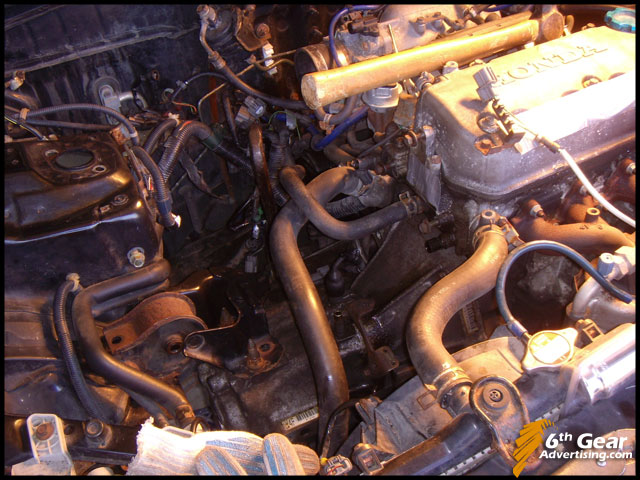
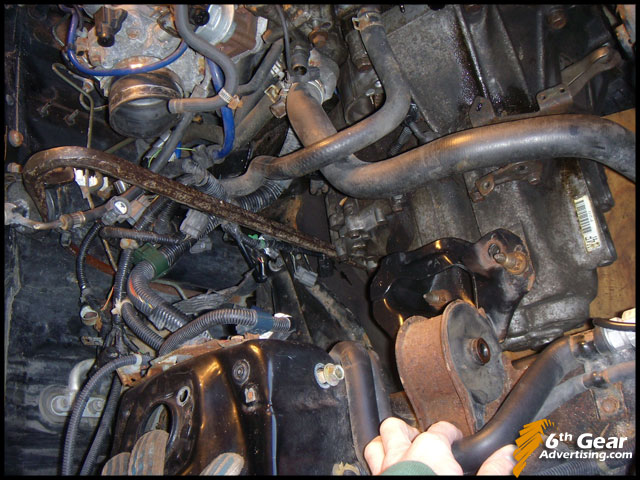
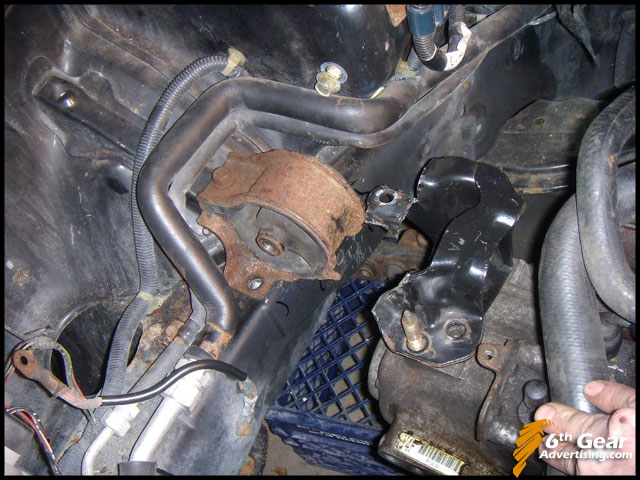
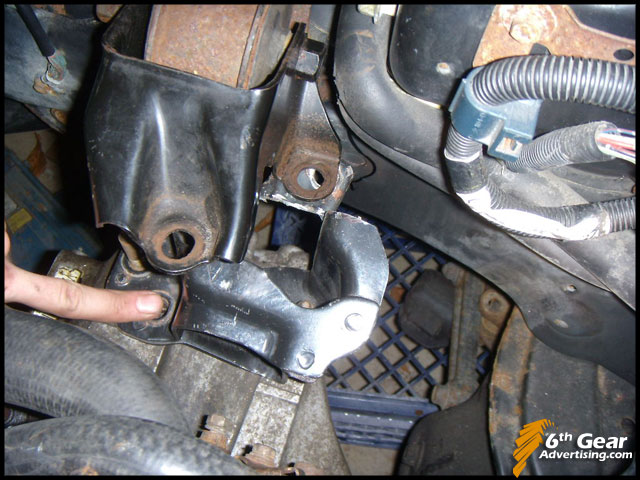
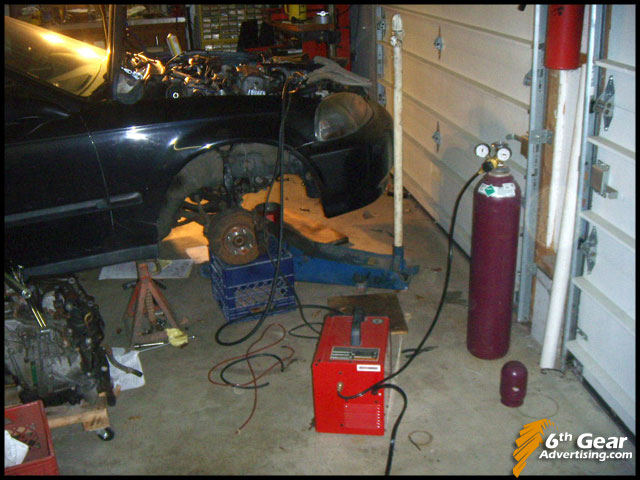
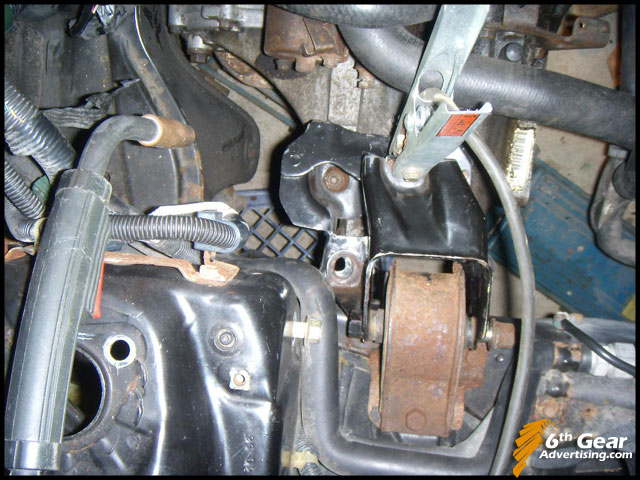
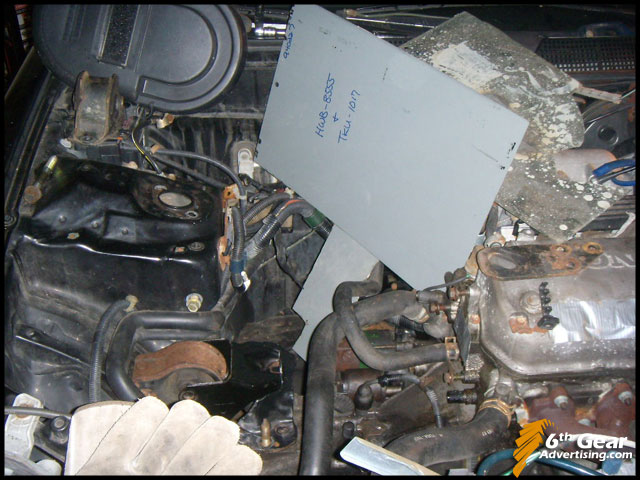
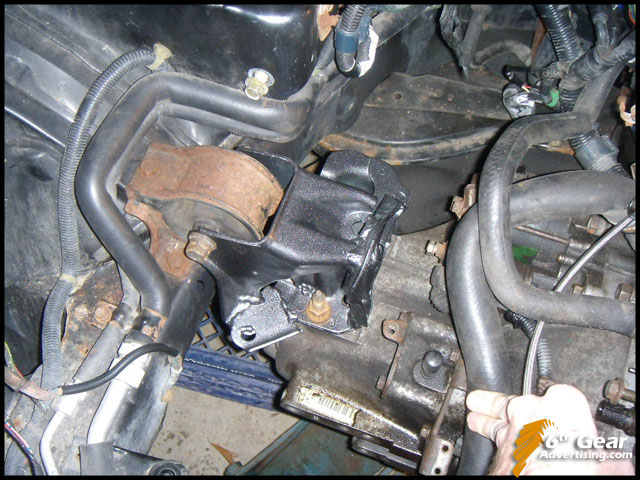
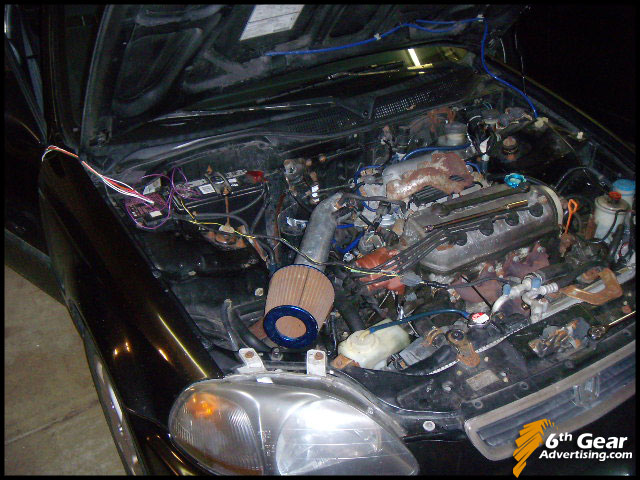
I am going to do the swap without removing the entire engine.

Tuesday, January 15, 2008

1. Getting to the CVT Tranny

This write up is only intended as an overview of converting your CVT Civic to Manual transmission. By reading further, you are agreeing that by attempting to do anything you see here, I am in no way responsible to any damage you cause to your transmission, your car, or yourself. I suggest you purchase a service manual for all the details, such as torque specs & tightening order.
There's a lot you'll have to remove before you can remove the CVT transmission.


- Support the vehicle on jackstands. Drain transmission fluid.


Remove the Air Intake


Unplug & Remove Distributor (mark it first so you can out it back on in the exact same position)


Unplug all sensors from the tranny, both o2 sensors, EGR, MAP, VSS, Sensors below distributor... anything that is going to be in the way. You may want to label some of them to make it easier when you hook them back up. Also unhook the shifter cable from the top of the tranny (mine was hard to pull off)


- Disconnect 2 metal lines going from tranny to radiator (over a drain pan)


Remove the Battery


unbolt the shock bracket from the lower control arm, unbolt the upper control arms from the shock towers, then unbolt the shock & lower bracket from the shock tower, set it aside.

Same for the driver side:


with the driver side axle out, you have room to get to the rear tranny bracket bolts


Remove the 10mm bolts that hold the rubber brake lines to the suspension and you should have enough room to squeeze the axle out without removing your caliper and rotor, but that is soon...


Set the axles aside, you will re-use them.


Remove the brackets in the way of the service plate, then unbolt & remove the service plate.


Unbolt all of the flex plate bolts. You'll have to rotate the crank pulley to bring each one to the opening at the bottom of the tranny where the service plate cover was.


Getting back to those rear bracket bolts... They are tight. You may need a breaker bar to get them loose, even after PB blaster. Now the engine/tranny is being held in place by only the side & lower front mounts.


Monday, January 14, 2008

2. Removing the CVT Transmission

This write up is only intended as an overview of converting your CVT Civic to Manual transmission. By reading further, you are agreeing that by attempting to do anything you see here, I am in no way responsible to any damage you cause to your transmission, your car, or yourself. I suggest you purchase a service manual for all the details, such as torque specs & tightening order.
All along the car has been on jackstands. Now you need something solid to put under the engine to support it. I used 2 wheels & some wood. You want something that is going to spread the weight of the motor out over a large surface area, to not put stress on a small part of the oil pan (like a big piece of wood). Whatever you use, make sure it is solid and sturdy.


Next use the floorjack and position it under the tranny to take the weight after you unbolt it.


Unbolt the bracket from the tranny. Remove the Mount from the chassis.

Same for the lower front mount, except you can just remove the bracket if your mount bolts are really rusty (like mine)


Remove all the bolts holding the tranny to the block, there should be 4 on this side.


You may need to pry the tranny away from the block with a big flathead screwdriver.


Pull the tranny away and slowly start to lower the jack. This is not very safe so be careful! The tranny can easily fall off of the jack if it is unbalanced and land on your foot. The CVT 'flywheel' will also be loose and can fall out (seen in pic below)


Here it is. Now you decide if you want to reuse it or swap to a manual.


The CVT tranny is bigger and heaver than the manual.


Sunday, January 13, 2008

3. Removing the flexplate, rear mount, & more

This write up is only intended as an overview of converting your CVT Civic to Manual transmission. By reading further, you are agreeing that by attempting to do anything you see here, I am in no way responsible to any damage you cause to your transmission, your car, or yourself. I suggest you purchase a service manual for all the details, such as torque specs & tightening order.


Remove the flex plate with a 12 pt 17mm socket. To make it stop turning, I stuck an extension through one of the holes


This write up is only intended as an overview of converting your CVT Civic to Manual transmission. By reading further, you are agreeing that by attempting to do anything you see here, I am in no way responsible to any damage you cause to your transmission, your car, or yourself. I suggest you purchase a service manual for all the details, such as torque specs & tightening order.


With the tranny out of the way, you can hop in the bay & remove the rear mount.


CVT rear mount vs manual rear mount


Manual rear tranny bracket: Manual vs CVT


On the other side of the bay, remove the 3 rubber plugs where the master cylinder will go.


Remove the lower dash panel.


While you're at it, remove the entire center console (back to the shifter later)


Here's where the master cyl comes through on the inside. Next I'm going to install the clutch pedal...

Saturday, January 12, 2008

4. Installing the manual pedals

This write up is only intended as an overview of converting your CVT Civic to Manual transmission. By reading further, you are agreeing that by attempting to do anything you see here, I am in no way responsible to any damage you cause to your transmission, your car, or yourself. I suggest you purchase a service manual for all the details, such as torque specs & tightening order.
One of the most annoying parts of any auto to manual swap on a civic... the pedals:


I've done them before, removing the whole brake gas pedal assembly by dropping the steering column. I decided to try a short cut this time...


The brake pedal is the only reason you need to remove the entire assembly and drop the column. The clutch pedal is a separate piece. So why not just replace the brake pedal?


Unbolt the brake pedal from the assembly.


It's hard to get pics of this part. But it was tough to remove the brake pedal from under the dash. First pull off the plastic column cover for more room. Then you will have to feel around and use box end wrenches to get to the bolts. It is not easy, but it is possible.


In the end, it would have been almost as easy to remove the whole unit since you get more room to work. Or if you can work in small spaces any you don't feel like taking everything apart, then this way is good for you.


Here are the auto and manual brake pedals. You can see that the auto brake pedal would have been too close to the clutch pedal.


Next install the clutch pedal. Get it in place, and them go back to the engine bay and install the master cyl.


There is not enough room behind the dash to fit the clutch pedal unit over the linkage from the master cyl. so don't try it.


Bolt in the clutch pedal and connect the linkage with a pin you need to buy from the dealership. I didn't have one so I used a nut & bolts for the time being. The PITA now was hooking up this spring:


There was not much room to work with, the clutch switch sensor here is what you will need to wire up if you want to have to push your clutch in before you start your car. I have never used it when doing a manual swap, just don't leave it in gear before you turn the key.


I pulled out the driver side kick panel for a little more room and found a second ECU for the CVT tranny. Keep this.


While you're up under the dash, look for the blue box located up above the pedals. Unplug the harness from it. Remove the box or leave it in.


Friday, January 11, 2008

5. Removing the auto shifter assembly

This write up is only intended as an overview of converting your CVT Civic to Manual transmission. By reading further, you are agreeing that by attempting to do anything you see here, I am in no way responsible to any damage you cause to your transmission, your car, or yourself. I suggest you purchase a service manual for all the details, such as torque specs & tightening order.
First the plastic cover and all the connectors.


Note the big connector. There are 2 thick wires on it that you will need to connect together. You can either run each wire to the clutch pedal switch if you want to have to push in the clutch to start your car, or just loop them together right here. This used to require that the shifter was in P to start the car. You car won't start without these 2 wires being connected.


looped:


Now to the underside of the car, there are 4 bolts that can get pretty rusty. Mine were not too bad though. Remove them.


And these 2:


There's 2 more bolts up toward the front that hold the shifter cable to the underside of the car, right behind the subframe.


Back in the car, unhook the shifter assembly from the shifter cable. Then remove the shifter & cable.


Next I'm going to finish things up in the engine bay.

Thursday, January 10, 2008

6. Installing the manual transmission

This write up is only intended as an overview of converting your CVT Civic to Manual transmission. By reading further, you are agreeing that by attempting to do anything you see here, I am in no way responsible to any damage you cause to your transmission, your car, or yourself. I suggest you purchase a service manual for all the details, such as torque specs & tightening order.
Get your clutch, pressure plate, and flywheel. Put a new pilot bearing in the flywheel.


Get your Manual flywheel bolts which are longer than the auto ones. Don't re-use the auto ones.


Some say use thread lock, some say don't bother. I use a little bit on the bolts.


Tighten them in a crisscross pattern, to 78 ft lbs. I believe. check your manual.

If you have trouble with the flywheel turning, you can use a bar and wedge it between the 12 point 10mm clutch bolts and the tranny bolts. There's 6 clutch bolts so you can wedge the bar in different positions to torque all of the flywheel bolts.


Next line up the clutch and stick your clutch alignment tool in to hold it in place.


Then line up the pressure plate in the right holes and bolt it in with the 12 point 10mm clutch bolts.


Install a new release bearing or "throwout bearing" as it is sometimes called. Apply some grease so it slides smooth.


It should slide like below:


Now you're ready to put your manual tranny in. Getting the shaft lined up with that pilot bearing is not easy, it never goes in without having to wrestle with it for a bit.


In the above pics, by tranny has no mount bolts. You can buy them from the dealer, or I took mine from the CVT. Sometimes they do not really want to come out though.


There is a bolt that goes in the third hole on the inside. But my tranny had the threads stripped in this hole so I only used 2 on the outside.


Now is a good time to bolt up the rear bracket. The CVT bracket uses smaller dia. bolts than the manual.


When you are putting this huge 19mm bolt in, be extremely careful. On the other side where this bolt comes through is a junction harness with some very important wires. Move the harness out of the way or you will pinch them between the bolt and the intake manifold bracket. This happened to me and it caused a major headache when I finally got the car back together.


Learn from my mistake:


The other side of the bracket:


You'll need to buy the right sized bolts for these holes.


The old ones next to the CVT bracket are smaller than the new ones I got from the dealership.


And while you're at the dealership, pick up a lower starter bolt, it is longer for a manual tranny. (in center of second pic)


There's a couple more brackets that you need that connect the lower side of the tranny to the block.

First get the service plate ready to install.


And here's the 2 brackets you need to put back on:


Behind the rusty exhaust, you see the long bracket re-installed. The end of the bracket goes over the sevice plate and helps to hold it on as well.


Here is the smaller aluminum bracket installed:


While you're here... I don't think it matters, but you can cap the transmission coolant lines on the radiator since you won't be needing them anymore.


Wednesday, January 9, 2008

7. Installing the axles & suspension

This write up is only intended as an overview of converting your CVT Civic to Manual transmission. By reading further, you are agreeing that by attempting to do anything you see here, I am in no way responsible to any damage you cause to your transmission, your car, or yourself. I suggest you purchase a service manual for all the details, such as torque specs & tightening order.
Axles:

I compared the CVT with other D-series axles and they are the same length, so re-use the axles.


Reinstall the axles & suspension in the reverse order that you removed them.


(yeah the sway bar endlink was broken, so I had some spare ones from my EG that I installed on both sides.)


And the other side:


Then tighten the axle nuts.


And don't forget to punch the inner lip so they don't come loose.


The lower front bracket from the CVT will not fit the manual tranny. You will need one from a manual EK.

I tried a spare one from an EG, close but did not quite fit.


So I'll have to pick one up sometime, but the car works OK without it for now.

Tuesday, January 8, 2008

8. Custom motor mount bracket

This write up is only intended as an overview of converting your CVT Civic to Manual transmission. By reading further, you are agreeing that by attempting to do anything you see here, I am in no way responsible to any damage you cause to your transmission, your car, or yourself. I suggest you purchase a service manual for all the details, such as torque specs & tightening order.
You will need to build a motor mount bracket next. The problem is that all manual & auto EK's have the passenger mount bolted to the frame rail. CVT HX's use a completely different mount setup in front of the shock tower.


The holes in the side of the frame rail that the other EK's have are not present on the CVT equipped HX's.


Luckily, making a motor mount is not rocket science. All you need is to cut & weld - but warning- it's not going to look pretty.


Here we have the Manual tranny bracket installed.


This is the Mount + bracket that the CVT uses.


CVT mount in place with manual bracket


Here is the regular mount that all the other EK's use. You can see where the holes would be on the side of the frame rail, there are small indentations, but no holes/threads for the bolts. It might not be a bad idea to get a hold of this mount just to hold it in place to be sure your tranny is lined up properly. Once you have it positioned in the right place, then you're ready to build the mount.


Here I had the tranny jacked up too high. I thought it would be a close fit, but when I stepped back, I could see the whole motor was crooked in the bay. That is the last thing you want, as it would put extra strain on the axles. Bolting up the rear mount & bracket first will help avoid this.


So here is the CVT mount properly lined up with the Manual tranny bracket - not even close.


I drew an outline of the regular mount that all the other EK's use, so that I could quickly & easily hold it up to be sure that nothing shifted as I would be welding I fitting the new bracket.


Now I am building a custom bracket by combining the CVT and Manual brackets.

Here they are in place:


There is no certain method to combining these 2 brackets, just be sure that nothing shifts & take it one step at a time. Do it by eye, and you'll need a bench vise & hammer to get clean bends.


First I began modifying the manual bracket to accept the CVT bracket.


The process is remove the bracket, modify it some, then install it again to be sure things are lining up as planned.


After you get everything pretty much lined up, time to weld. You only need a small MIG. You'll be tack welding the brackets together while installed in the engine bay to be sure that everything will be positioned correctly.


You've got fuel lines in the bay, so be sure you protect them from sparks.


Here I have the mount tacked together.


Remove it from the bay and then do all the heavy welding...


There it is in all of its ugliness!


I still need to add an extra support, but didn't have much scrap that I could use... So I cut off a piece of an OEM upper control arm and bent it up a little.


And here it is in the bay, everything measures up!


After using a wire wheel on the welds & cleaning & degreasing the frankenstein bracket, I sprayed it with a couple light coats of Self Etching Primer.


Then painted it for the OEM look, and to prevent it from rusting.


Yeah, I'm a hillbilly, but at least I painted it :P

Monday, January 7, 2008

9. Installing the shifter & linkage

This write up is only intended as an overview of converting your CVT Civic to Manual transmission. By reading further, you are agreeing that by attempting to do anything you see here, I am in no way responsible to any damage you cause to your transmission, your car, or yourself. I suggest you purchase a service manual for all the details, such as torque specs & tightening order.
Shift Linkage:
You will need to remove the belly in the floorpan that covered the bottom of the auto shifter unit. First, drill out the spot welds.


Then you should be able to move the piece, but there will be a couple more spot welds further up that hold the front on.


Rather than climb under the car to drill them out, I just bent it back and forth until they broke, with the help of a pry bar.


Removed:


The manual shift linkage will need 2 new holes drilled to bolt to the floor. There are 2 round recessed areas behind the original holes, drill right in the center of those.


This is why you drilled the holes, this bolts in from the underside of the floor.


I looked around my garage and found some hardware, but you may need to go to the hardware store. Be sure you use lock washers so these never come loose.


Before you bolt in the shift linkage, spray some undercoating around the shifter holes where you drilled the spot welds. This could help prevent rust.


Get everything in place. I already have the front piece of the linkage attached to the tranny. If yours is not attached, you will need to buy the "bitch pin"


Then I bolted up the end of the shift linkage using a bolt I had to buy from the dealership.


Just connect everything together, I was able to do it w/o removing the exhaust to save some time.


If you don't have anybody around to hold the shifter in place while you bolt it in from the bottom, this works:


Then cut a patch to go over the hole that the cable went through.


Put a nice thick bead of silicone around the edges of the hole so water stays out.


Sunday, January 6, 2008

10. Clutch Line

This write up is only intended as an overview of converting your CVT Civic to Manual transmission. By reading further, you are agreeing that by attempting to do anything you see here, I am in no way responsible to any damage you cause to your transmission, your car, or yourself. I suggest you purchase a service manual for all the details, such as torque specs & tightening order.
Back to the engine bay, you have 2 options for the clutch line that goes from the Master Cylinder on the firewall to the Slave Cylinder on the tranny. You can buy everything from the dealership or junkyard and install it like Honda did on the assembly line. Or for less $$ than the dealership would charge, buy the Earl's stainless clutch line (search for "civic clutch line" on ebay)


Here is a slave cylinder (with part of the OEM clutch line attached)


I ran the Earl's line all the way from the master cyl straight to the slave cyl, under the intake manifold, close to the block. if I had ran it along the firewall, I would have had to connect it to the OEM rubber hose section to reach the slave cylinder.


And use some teflon tape on the threads for extra protection against any leaks.


Then fill the tranny.


Friday, January 4, 2008

11. ECU, oxygen sensor and wiring

This write up is only intended as an overview of converting your CVT Civic to Manual transmission. By reading further, you are agreeing that by attempting to do anything you see here, I am in no way responsible to any damage you cause to your transmission, your car, or yourself. I suggest you purchase a service manual for all the details, such as torque specs & tightening order.

There are are 2 ECU's for the HX. P2N (cvt) and P2M (manual).


The P2N uses a 4 wire primary o2 sensor. The P2M uses an expensive 5-wire wideband primary o2 sensor.

Other OBD2 ecu's from automatic civic's have an additional set of pins in the B section. Neither the P2N or P2M have any pins in the B section of the ecu pinout.


(the P2N & P2M ECU's are on top, the bottom ecu is from an automatic dx with the pins in the B plug section)


The CVT HX uses a separate ECU located behind the driver side kick panel. There's a harness going to and from this CVT ECU.


I purchased the 5-wire o2 and the P2M ecu for the swap.


The first thing you'll need to use the 5-wire o2 is an 8 pin harness to connect to it. I clipped this one from an old OBD1 harness I had laying around.


This Space Reserved! I had a piece of paper that I wrote all of the ECU pinouts on for 1-8 on this plug. It is essential info and I know I have it in the garage somewhere....


You'll need some soldering supplies for the harness.


You'll be adding onto the plug, a few feet should be long enough to reach the ECU.


Any connections you make should be crimped AND soldered.


Here is the wideband (cleaner one) compared to the old 4 wire o2 sensor.


Before you run all of the wires through the firewall, make sure you have everything right. Short cut through the passenger door for testing.


And that's where my idea of using the manual ECU and 5-wire o2 ended. After I did all that work, the car was running rough. The electrical system was already screwy from the wires in the junction harness that got pinched by the rear bracket bolt. So it could have had to do with that, or I also read that I needed to use an intake manifold & throttle body from a manual civic. Well, the HX manifold is the only D16 OBD2 one with an EGR valve. So in order to see if this was going to work, I had to find an intake manifold & throttle body from a manual civic hx. I needed to drive my car, so I scrapped the whole idea of using the 5-wire o2 & manual ECU. The one good thing when I had it hooked up & running was no CEL #70 for the transmission. But I'll live with that for now. Maybe this summer when I have my EG to drive, I'll be able to try looking for the manifold & throttle body from a manual HX. I am told that the reason for this is the manual cars use a 2 wire IACV, while the automatic ones use a 3 wire IACV. I am going to experiment and see if I can splice 2 of the wires from the 3 wire IACV together, since I believe one of them is used when driving and the other one is used when not moving. I think this may be the reason for the occasional bouncy idle when coming to a stop, or putting the car in neutral and coasting when using the automatic ECU. Besides the CEL being lit constantly, and the bouncing idle, the car runs great with the 4 wire harness & automatic ecu. I left the CVT ecu plugged in as well. When driving with it unplugged, I got another CEL, #30, instead of the #70 I got before.


Below is the information for wiring the wideband o2 sensor to the manual P2N ecu


Engine Harness connector for the 5-wire o2 sensor:


Wideband 5 wire & 4 wire O2 diagram:


Here's a list of pinouts that will come in handy when hooking up the wideband wires to your ECU's harness: Thanks to http://ff-squad.com for taking the time to post such useful info!


Here is some useful information about the 3 plug vs 2 plug IACV (Thanks again to http://ff-squad.com for taking the time to post such useful info):


This part of the swap will be revisited at a later date when I have the time (and it is warm out) Until then, I'm driving the car with the CEL #70 on.